Asteroids
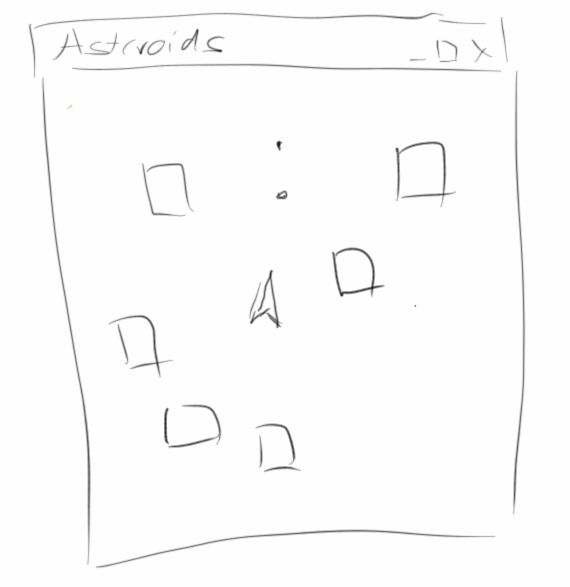
This chapter is again about graphics and games. But before we get started we first need to learn about arrays. This then allows us to manipulate images, which are nothing but two-dimensional arrays. Next we spend some more time on object orientation, namely inheritance and composition. And we will also learn how to work with key events.
.
 Arrays
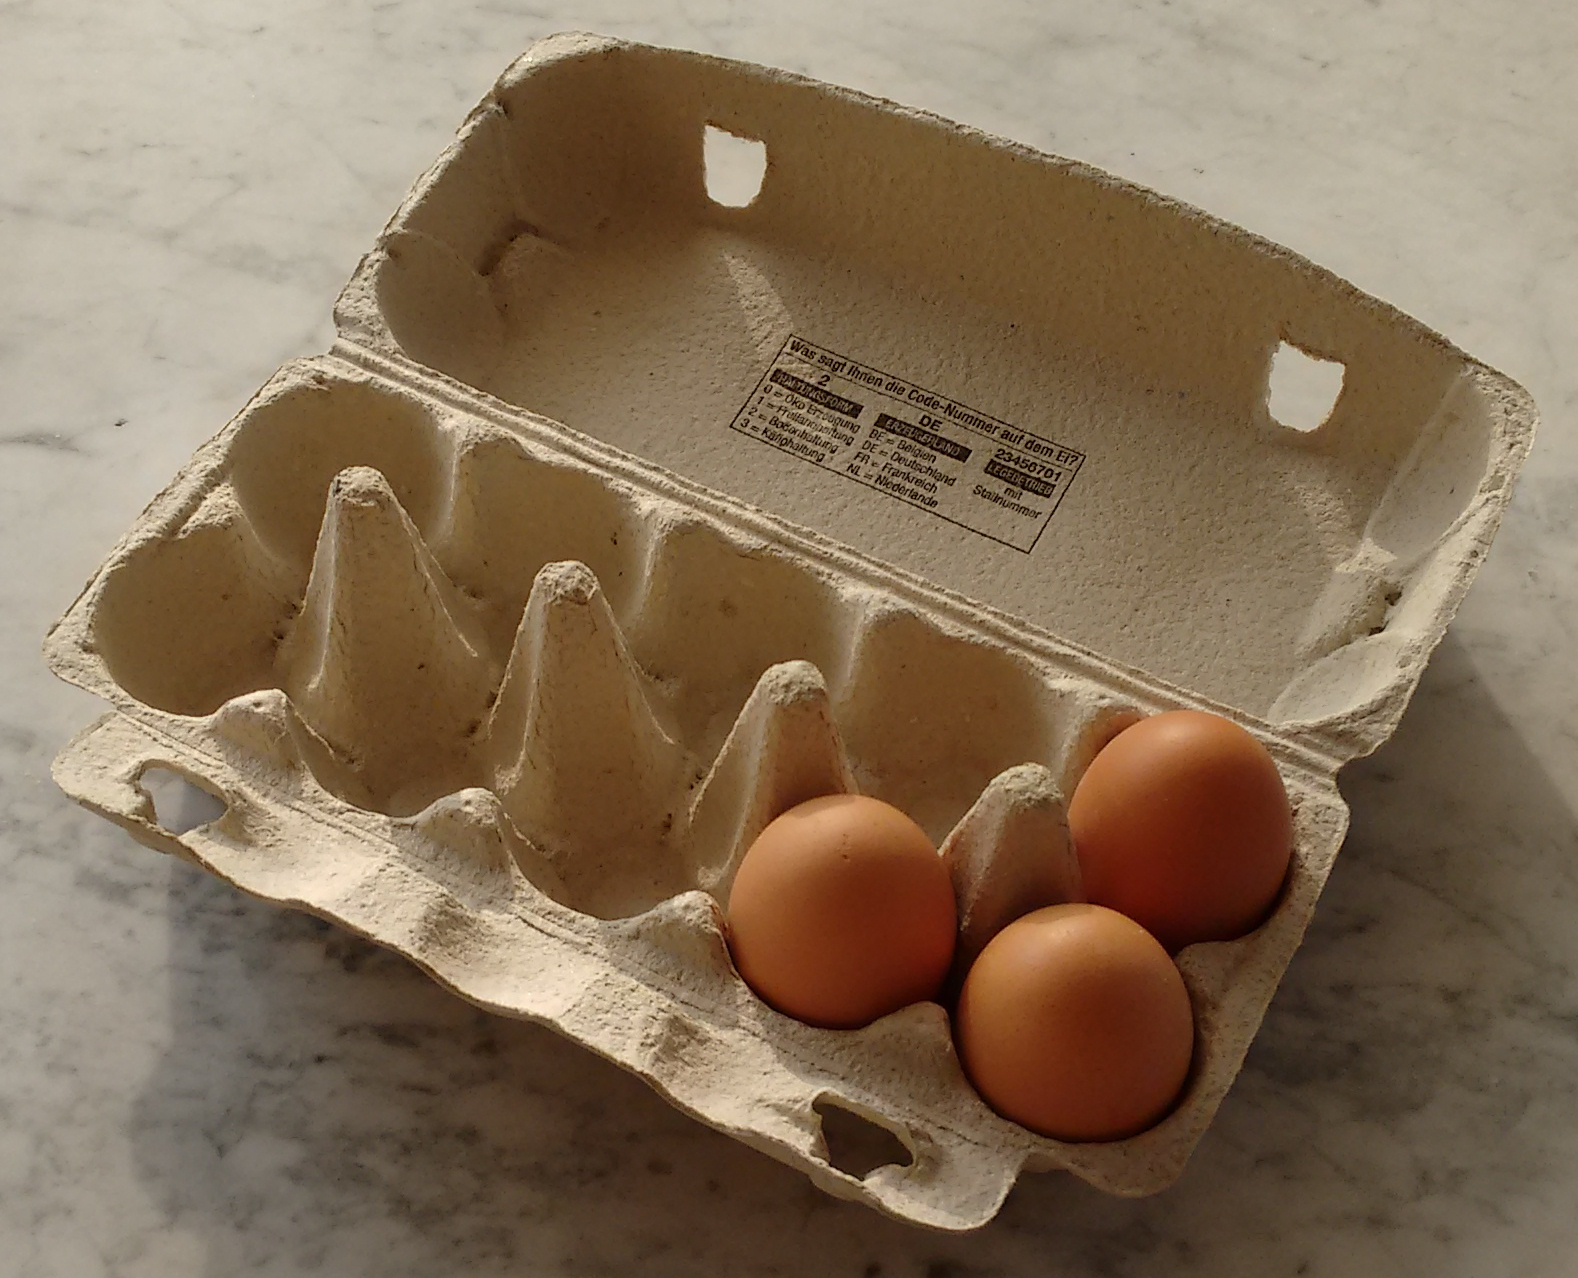
What are arrays? An egg carton is an array. It's an array for ten eggs. That does not necessarily mean that there are always ten eggs in there, sometimes there are only three eggs in it.
Obviously, arrays are quite practical and therefore we will take a closer look at arrays in JavaScript. Suppose we wanted to create an empty array, then we would write:
let eggs = [];
The square brackets say that we declared an empty array. We can also create an array that has stuff in it, like numbers:
let eggs = [1, 2, 3, 4];
In this case, the array has four numbers in it. We can create arrays of any data types, e.g. we could also create an array with four GOvals:
let circles = [];
circles[0] = new GOval(100, 66, 50, 50);
circles[1] = new GOval(100, 116, 50, 50);
circles[2] = new GOval(150, 66, 50, 50);
circles[3] = new GOval(150, 116, 50, 50);
Arrays have the important property that they are ordered, i.e. they are numbered consecutively starting with 0.
.
Working with Arrays
After we have declared and created an array, we have to fill it with values. We can do this by hand,
let eggs = [];
eggs[0] = 0;
eggs[1] = 2;
eggs[2] = 4;
...
eggs[9] = 18;
Meaning we assign the first element in the array (element number 0) the value 0, the second element the value 2 etc. We can also do the assignment with a loop:
let eggs = [];
for (let i=0; i<5; i++) {
    eggs[i] = await readInt("?");
}
or as we have seen above:
let eggs = [ 2, 4, 6, 8 ];
If we want to access an element, we have to enter its house number. So we access the third element with:
println( eggs[2] );
If we want to output all elements, it is best done with a loop:
for (let i=0; i<eggs.length; i++) {
	   println( eggs[i] );
}
.
Exercise: MonthName
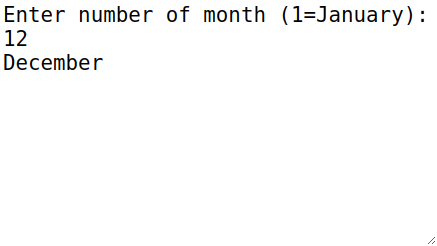
A useful example is the conversion of the month as a number, e.g. 12, into the months name, e.g. December. You could do this with a lengthy if or switch condition, but you can also do it very elegantly with arrays:
const monthName = ["January", "February", "March", "April",
    "May", "June", "July", "August", "September", "October",
    "November", "December"];

async function setup() {
    createConsole();

    let monthNr = await readInt("Enter number of month (1=January): ");
    println(monthName[monthNr - 1]);
}
.
Exercise: Array of Objects
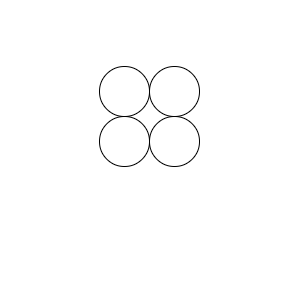
Arrays are not only useful with numbers and strings, but also with objects. Let's say we want to create an array with four ovals in it, The following code would do that:
function setup() {
    createCanvas(300, 300);
    frameRate(5);

    let circles = [];
    circles[0] = new GOval(100, 66, 50, 50);
    circles[1] = new GOval(100, 116, 50, 50);
    circles[2] = new GOval(150, 66, 50, 50);
    circles[3] = new GOval(150, 116, 50, 50);
    add(circles[0]);
    add(circles[1]);
    add(circles[2]);
    add(circles[3]);
}

function draw() {
    update();
}
.
Multidimensional Arrays
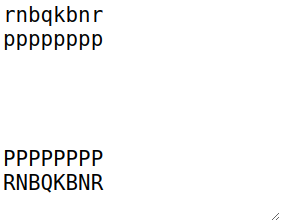
One-dimensional arrays are fun and save us a lot of paperwork. But two-dimensional arrays are even cooler. We start quite simple with the game of chess, which can be represented by an 8 by 8 array of chars:
const chess = [
    ['r', 'n', 'b', 'q', 'k', 'b', 'n', 'r'],
    ['p', 'p', 'p', 'p', 'p', 'p', 'p', 'p'],
    [' ', ' ', ' ', ' ', ' ', ' ', ' ', ' '],
    [' ', ' ', ' ', ' ', ' ', ' ', ' ', ' '],
    [' ', ' ', ' ', ' ', ' ', ' ', ' ', ' '],
    [' ', ' ', ' ', ' ', ' ', ' ', ' ', ' '],
    ['P', 'P', 'P', 'P', 'P', 'P', 'P', 'P'],
    ['R', 'N', 'B', 'Q', 'K', 'B', 'N', 'R']];
Lowercase letters stand for black, and uppercase letters for white. If we want to display the playing field, then we could do that with two nested for loops:
function printChessBoard() {
    for (let i = 0; i < 8; i++) {
        for (let j = 0; j < 8; j++) {
            print(chess[i][j]);
        }
        println();
    }
}
.
Exercise: GrayImage
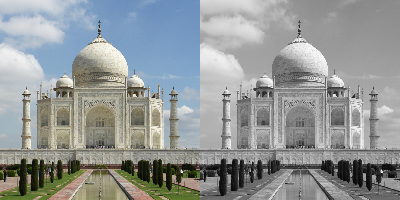
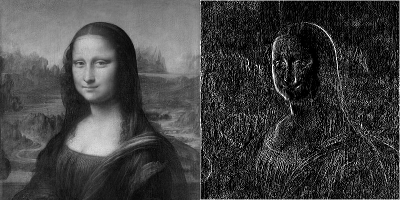
Images are just two-dimensional arrays. As a little exercise we want to convert a color image into a gray image. First we load the image using the GImage class:
let image = new GImage("Ch7_Asteroids/Taj_Mahal_(Edited).jpeg");
Next, we need to get to the pixels. This can be done with the method getPixelArray() of the class GImage:
let pixels = await image.getPixelArray();
let width = image.width;
let height = image.height;
This gives us a two-dimensional array of numbers. Notice the await, which is neccessary because sometimes it takes a little longer for an image to load, and we should not access the pixels of an image before it is loaded.
One pixel consists of four numbers: the first for the red color, second for the green color, third blue color and the fourth is the alpha value of a pixel, that is its transparency. Let's say we want to access a pixel at position x=5 and y=22, then the following formula gives us the position of that pixel:
let i = (y * width + x) * 4;
To get to the color values, we use this index:
let red = pixels[i + 0];
let green = pixels[i + 1];
let blue = pixels[i + 2];
let alpha = pixels[i + 3];
This is how we read the pixels. But we want to create a new gray image. Hence, first we need to create a new empty pixel array:
let pixelsGray = [];
Then we use the formula that Gimp uses to calculate the gray value of a pixel [2]:
let lum = Math.trunc(0.21 * red + 0.72 * green + 0.07 * blue);
and then we put these values into the new pixel array:
pixelsGray[i + 0] = lum;
pixelsGray[i + 1] = lum;
pixelsGray[i + 2] = lum;
pixelsGray[i + 3] = alpha;
This we do for all the pixels in the array using a nested for-loop:
for (let y = 0; y < height; y++) {
    for (let x = 0; x < width; x++) {
		...
	}
}
Finally, we turn this array back into a new GImage:
let gray = new GImage(width, height);
gray.setPixelArray(pixelsGray);
add(gray, 200, 0);
.
Object Orientation
In the second part of this chapter we want to deepen our understanding with regards to object orientation. The two big themes are inheritance ("is a" relationship) and composition ("has a" relationship). We start with a little game, the MarsLander.
.
Exercise: MarsLander
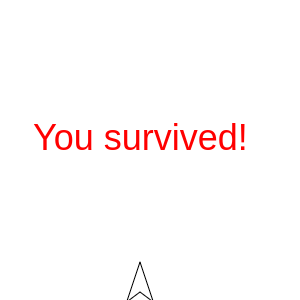
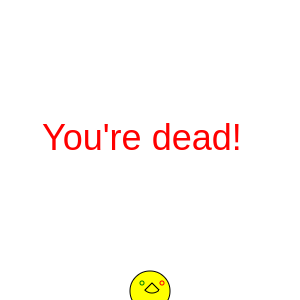
In the next decade, Elon Musk wants to send the first humans to Mars. Karel volunteered and needs to practice landing. For this purpose, we need to write a MarsLander simulator. It's about landing a spaceship safely on Mars. The plan is to use the arrow keys (up and down) to slow down or accelerate our spaceship. If the touchdown speed is to high, Karel dies.
We will use the top-down approach, starting with the draw() method:
function draw() {
    if (spaceShip != null) {
        moveSpaceShip();
        checkForCollision();
    } else {
        displayGameOver();
        noLoop();
    }
    update();
}
As usual, there is also a setup() that creates the spaceship. The game loop looks exactly like our last animation, billiards. What's interesting now is that we no longer have an infinite loop, but a loop with the abort criterion: namely if there is no more SpaceShip, i.e. spaceShip == null, then the game should stop. The noLoop() statement stops the looping.
We have three instance variables,
let spaceShip;
let vy = 0;
let vx = 0;
i.e. the spaceShip, together with its velocities vx and vy.
In the setup() the spaceShip is initialized. The code is identical to the one from the exercise in chapter two, nothing new here,
function setup() {
    createCanvas(APP_WIDTH, APP_HEIGHT);
    frameRate(5);

    spaceShip = new GPolygon();
    spaceShip.addVertex(0, -SPACE_SHIP_SIZE);
    spaceShip.addVertex(-2 * SPACE_SHIP_SIZE / 3, SPACE_SHIP_SIZE);
    spaceShip.addVertex(0, SPACE_SHIP_SIZE / 2);
    spaceShip.addVertex(2 * SPACE_SHIP_SIZE / 3, SPACE_SHIP_SIZE);
    add(spaceShip, (APP_WIDTH - SPACE_SHIP_SIZE) / 2, SPACE_SHIP_SIZE);
}
The moveSpaceShip() method is absolutely trivial:
function moveSpaceShip() {
    vy += GRAVITY;
    spaceShip.move(vx, vy);
}
The speed of our space ship increases with every step by the GRAVITY of Mars, and it is moved by its velocities.
In the checkForCollision() method we check if we have already reached the surface of Mars:
function checkForCollision() {
    let y = spaceShip.getY();
    if (y > (APP_HEIGHT - SPACE_SHIP_SIZE)) {
        spaceShip = null;
    }
}
If so, we simply set the spaceShip to null. Here "null" means: "not initialized" or "there is none" or "does not exist". We can set objects explicitly to null, which means that we delete the object. In our example, we use this to end our game loop.
What remains are the key events: similar to the mousePressed() method, there is a keyPressed() method:
function keyPressed() {
    switch (keyCode) {
        case 38: // up
            vy--;
            break;
        case 40: // down
            vy++;
            break;
    }
}
Of course we want to know which key was pressed and this we get from the keyCode. Each key has its own key code, and for the up key this is 38 and for the down key this is 40.
Now we can play or rather train for our Mars mission.
.
Inheritance
What does MarsLander have to do with inheritance? Not much yet. But let's look at the code. What should bother us a little bit are the following three lines,
let spaceShip;
let vy = 0;
let vx = 0;
because vx and vy are the speed of the spaceShip, meaning they actually belong to the spaceShip. Suppose we had several spaceShips, or we had a lot of asteroids moving around, then we would have a lot of vx's and vy's. And it's going to be very confusing and ugly.
To prevent this we do the following: we declare a new class called GSpaceShip and we put everything that has to do with the spaceShip into this class:
class GSpaceShip extends GPolygon {

    constructor(x, y) {
        super(x, y);
        super.addVertex(0, -SPACE_SHIP_SIZE);
        super.addVertex(-2 * SPACE_SHIP_SIZE / 3, SPACE_SHIP_SIZE);
        super.addVertex(0, SPACE_SHIP_SIZE / 2);
        super.addVertex(2 * SPACE_SHIP_SIZE / 3, SPACE_SHIP_SIZE);

        this.vy = 0;
        this.vx = 0;
    }

    move() {
        this.vy += GRAVITY;
        super.move(this.vx, this.vy);
    }
}
First, we see that GSpaceShip is a GPolygon, because it says "GSpaceShip extends GPolygon". This means that GSpaceShip inherits all properties and methods from GPolygon. That is why inheritance is also said to be an "is a" relationship.
Second, we see that the global variables vx and vy are now instance variables of the spaceShip, so they are where they belong.
Third, we take a look at the constructor: there we see a "super()" in the first line. The method super() does nothing else but call the constructor of the superclass, the parent class. In our case, the GPolygon(). Then we see how we add vertices to ourselves (we are now a GPolygon). So in the constructor we create our spaceship appearance.
Finally, we see that we have added a new method called move(). Since GSpaceShip now knows its own speed, it can also move itself.
Inheritance therefore has many advantages: above all, it leads to classes becoming more independent and having fewer dependencies. It is also said that the class takes responsibility for its own attributes (variables) and behavior (methods). These lesser dependencies also lead to a smaller coupling, which makes our code less complicated.
Let's have a look at the simplifications in MarsLander2. First, we only need one instance variable:
let spaceShip;
and also the setup() and moveSpaceShip() methods become much cleaner:
function setup() {
    createCanvas(APP_WIDTH, APP_HEIGHT);
    frameRate(5);

    spaceShip = new GSpaceShip();
    add(spaceShip, (APP_WIDTH - SPACE_SHIP_SIZE) / 2, SPACE_SHIP_SIZE);
}

function moveSpaceShip() {
    spaceShip.move();
}
This is pretty cool. We will really come to appreciate these simplifications when it comes to programming the Asteroids game.
.
Composition
The second important concept of object orientation is composition. As we have seen, you can create new classes (GSpaceShip) by inheritance from an existing class (GPolygon). But we can also create new classes by composing them from several existing classes.
As an example we write a class GSmiley.
class GSmiley extends GCompound {

    constructor(SIZE) {
        super();

        let face = new GOval(SIZE, SIZE);
        face.setFilled(true);
        face.setFillColor(Color.YELLOW);
        this.add(face);

        let leftEye = new GOval(SIZE / 10, SIZE / 10);
        leftEye.setColor(Color.GREEN);
        this.add(leftEye, SIZE / 4, SIZE / 4);
        let rightEye = new GOval(SIZE / 10, SIZE / 10);
        rightEye.setColor(Color.RED);
        this.add(rightEye, 3 * SIZE / 4, SIZE / 4);

        let mouth = new GArc(SIZE / 2, SIZE / 2, 225, 90);
        this.add(mouth, 0.3 * SIZE, 0.3 * SIZE);
    }
}
Our GSmiley consists of different components, so it has a face, a leftEye, a rightEye and a mouth. In the constructor we create a new object from several old objects. That's composition. That's also why we say that composition is a "has a" relationship, because GSmiley has a face, a leftEye, a rightEye and a mouth.
.
GCompound
We can also mix inheritance and composition. If we add "extends GCompound" to the class declaration for the GSmiley example, then we can also use GSmiley in our MarsLander. If we simply replace "GPolygon" with "GSmiley" in our first version of the MarsLander, the program works like before, only our spaceship now looks like a smiley.
.
 Inheritance vs Composition
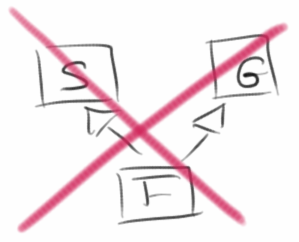
When should we use inheritance and when composition? A rule of thumb is, if possible, use composition. This has to do with the fact that there is no multiple inheritance in JavaScript. So a class can't have two parents. This restriction does not apply to composition, in principle a class can consist of any number of components.
.
.
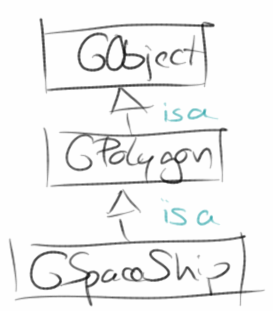 A small note: by multiple inheritance we mean that a class has several parent classes. That's not allowed. But it is quite possible that a class has a parent class, and this parent class again has a parent class, so to speak the grandparent class of the original. For example, GObject is the grandparent class of the GSpaceShip class. That's allowed.
.
.
Review
With the principles of inheritance and composition we have reached and cracked the core of object orientation. We have learned how to give an existing class additional properties through inheritance. A GPolygon cannot move independently because it has no speed. The class GSpaceShip, which is actually also a GPolygon, knows its own speed and can move by itself. We have also seen that we can assemble a new class from several existing classes via composition. Both are very useful, as we will see.
In addition, we have learned a few other useful things, such as
- arrays,
- multidimensional arrays,
- image processing,
- key events,
- and we used the class GCompound.
.
Projects
The projects in this chapter are fun projects. Here we go.
.
Swap
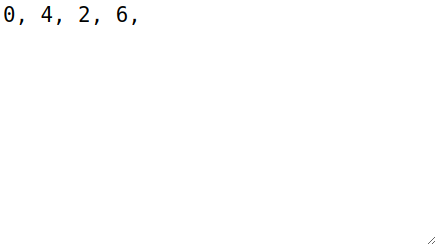
In this project we want to swap two elements in an array. In the array
let arr = [0, 2, 4, 6];
we want to swap the element at the second position (the "2") with the element at the third position (the "4"). We want to do this with a method swap(arr), which has an array as parameter.
Two things we want to learn in this exercise: First, in arrays we always start counting from 0. Second, arrays are passed as reference, i.e. if we pass an array as a parameter to a method, then we pass the original, not a copy. All changes we make to it in the method are permanent, i.e. change the original array.
.
ExamStatistics
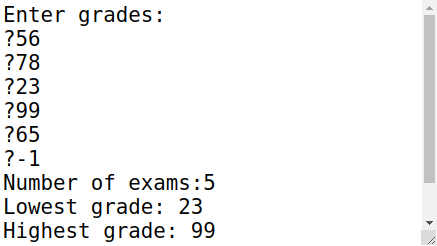
As another example for the use of arrays let us store the grades of an exam in an array. Since we do not yet know exactly how many students will take the exam, but it is very unlikely that there will be more than 100, we will create an array for 100 grades:
let scores = [];
Then we ask the user to enter the grades. For this the loop-and-a-half is ideally suited. To know when we are done, we agree that entering a "-1" (the sentinel) means that all grades have been entered.
Once we have all the grades in the array, we want to calculate some statistical data about the grades like total number of students who took the exam, the average grade, the lowest grade and the highest grade.
.
PianoConsole
As our first application for arrays we write a small music program. Before being able to play sound, we need to load a library that allows us to do that. Therefore, at the beginning of your code, place the following include() statement:
include("./libraries/p5.sound.min.js");
(Also, sound may not work on mobile devices, I had problems with an iPad playing any sound.)
Once we have that, we can start by storing our melody in an array,
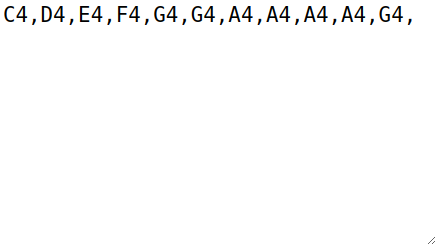
const tune = [0, 1, 2, 3, 4, 4, 5, 5, 5, 5, 4];
where 0 refers to C4, 1 to D4, etc. But before playing, we must load the sound files. Those must be preloaded:
const songFileNames = "CDEFGAB";
function preload() {
    for (let i = 0; i < songFileNames.length; i++) {
        let soundName = songFileNames.charAt(i) + '4';
        let fileName = 'Pr7_Asteroids/music/' + soundName + '.wav';
        soundFiles[i] = loadSound(fileName);
    }
}
Preloading is neccessary, because sometimes the internet is a little slow, and we want to make certain that our program only starts after all the sound files have loaded.
Next we initialize our program. Since console programs usually have no loop, we must turn the loop on, and we also declare and initialize the currentSong variable.
let currentSong;
function setup() {
    createConsole();
    loop();
    frameRate(5);

    currentSong = soundFiles[0];
}
Now we are ready to play our tune:
function draw() {
    if (!currentSong.isPlaying() && counter < tune.length) {
        let tun = tune[counter];
        print(songFileNames.charAt(tun) + ",");
        currentSong = soundFiles[tun];
        currentSong.play();
        counter++;
    }
}
We wait until a sound file has finished playing, before we move to the next. Our counter helps us to keep track on which sound to play. Obviously, you can play other melodies, add different and more sound files, etc.
.
Piano
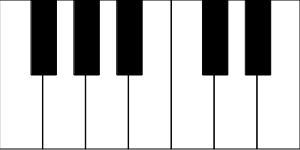
Console applications are always a little more boring, and honestly, who would spend any money on them? But we already wrote a UI for our piano in the second chapter. Of course we want to control our piano with the mouse.
The question that arises is how do we know which key was pressed? Interestingly, we can use the getElementAt() method for this:
function mousePressed() {
    let x = mouseX;
    let y = mouseY;
    let obj = getElementAt(x, y);
    if (obj !== undefined) {
        ...
    }
}
This gives us the GRect that was pressed. Now there are three alternatives to go on:
- If the GRect had a name, then we would know which tone to play. We can do this with inheritance: we define a new class GKey, which is a GRect and has an additional attribute for the name.
- We memorize somewhere the x-coordinate of the keys. With obj.getX() we can get it, and viola we know which key was pressed.
- Or we keep references to all keys in an array.
Let us take a closer look at this third possibility. For this we need an array as global variable:
let keys = [];
When we create the keys, we store them in our global array:
let keyCounter = 0;
// draw 8 white keys
for (let i = 0; i < 7; i++) {
    keys[keyCounter] = new GRect(WIDTH / 7, HEIGHT - HEIGHT_OFFSET);
    add(keys[keyCounter], i * WIDTH / 7, 0);
    keyCounter++;
}
And now we can simply test for equality in our mousePressed() method:
function mousePressed() {
    let x = mouseX;
    let y = mouseY;
    let obj = getElementAt(x, y);
    if (obj !== undefined) {
        for (let i = 0; i < songFileNames.length; i++) {
            if (obj == keys[i]) {
                print(songFileNames.charAt(i) + ",");
                currentSong = soundFiles[i];
                currentSong.play();
            }
        }
    }
}
If we could get this program to work on our mobile phones, we'd be rich! (Next year...)
BTW, only worry about the white keys. The black keys are a little tricky, in a little while we learn even simpler ways to do this.
.
FlippedImage
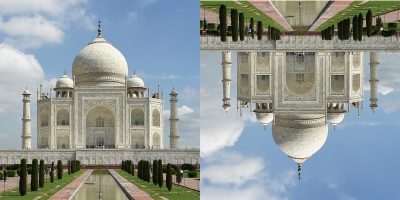
When manipulating images we usually use arrays. We have already seen how we can access the pixels of an image. In this example we want to mirror a given image. This can be done horizontally or vertically. To do this, we create a new array for the pixels
let pixelsFlipped = [];
and use two nested loops
for (let y = 0; y < height; y++) {
    for (let x = 0; x < width; x++) {
        let i = (y * width + x) * 4;
        let j = ((height - y) * width + x) * 4;
        pixelsFlipped[j + 0] = pixels[i + 0];
        pixelsFlipped[j + 1] = pixels[i + 1];
        pixelsFlipped[j + 2] = pixels[i + 2];
        pixelsFlipped[j + 3] = pixels[i + 3];
    }
}
to swap the pixels. From the new array we create a new image via
let flipped = new GImage(width, height);
flipped.setPixelArray(pixelsFlipped);
return flipped;
.
GrayImageXOR
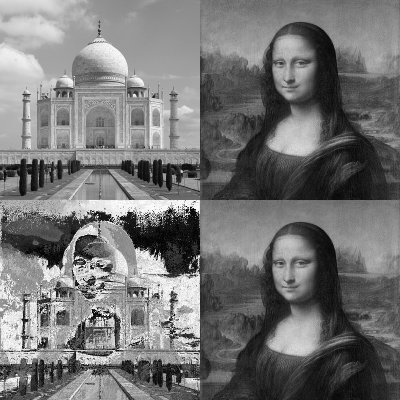
Steganography is the art of hidden transmission of information [3]. It is interesting that this can be done quite simply with the XOR function, i.e. the Exclusive Or. How do we do that? Let's assume we have two images and their pixel arrays:
let pixels1 = await grayImage1.getPixelArray();
let pixels2 = await grayImage2.getPixelArray();
then we get the red value for each pixel, for example:
let i1 = pixels1[i];
let i2 = pixels2[i];
And just as we could add these two values, we could also use the XOR function:
let xr = i1 ^ i2;
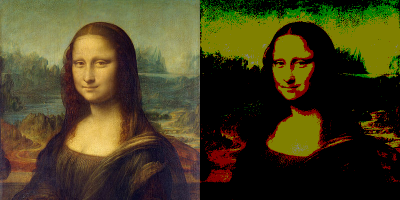
We make a bit-wise XOR of the bits of r1 with those of r2. To test this, we take the Taj and the Mona Lisa as images, and 'XOR' them. The result is a funny mixture, where you can recognize neither one nor the other, or both depending. The interesting thing happens, when we take the pixels of that mixed image and let the XOR function run over it again: then the original image appears again. Interestingly, exactly the opposite. This can also be used for encryption.
The RAID-5 system is based on the same principle and is used to provide failure safety for hard disks [4].
.
ColorImage
A common use of image manipulation is to reduce the number of colors in an image. This is a nice application for rounding to integers.
let r = pixels[i + 0];
r = Math.trunc(r / FACTOR) * FACTOR;
Originally r can take values between 0 and 255. If we divide this number by let's say 64, then we only have values between 0 and 3. If we multiply this again by 64, we only have the values 0, 64, 128 and 192. So there are only four red values left.
.
ImageFilterSimple
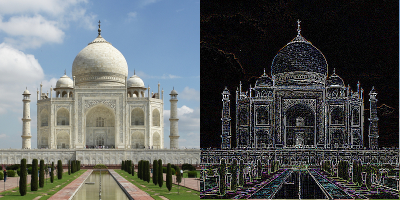
You can also perform many other image manipulations. For example, you can simply subtract adjacent pixels:
let n = (y * w + x - 1) * 4;
r[0][1] = pixels[n + 0];
n = (y * w + x) * 4;
r[1][1] = pixels[n + 0];
...
let xx = r[1][1] - r[0][1];
xx *= 10;
...
let nn = (y * w + x) * 4;
pixelsGray[nn + 0] = xx;
The result corresponds to a simple edge detection.
.
ImageFilterMatrix
Much more interesting image manipulations become possible if we realize that arrays are also matrices. You may want to keep this to yourself, or you might get burned [6]. But once you know that, you can do cool things with images. The filters sharpen, blur, edgeEnhance, edgeDetect, or emboss, as they are known from any image processing program, are actually only the application of a convolution matrix on an given image [5]. For example, to sharpen an image, the following matrix will do the trick:
let currentFilter = [
	[0, -1, 0],
	[-1, 5, -1],
	[0, -1, 0]
];
let currentFactor = 1;
Executing matrix multiplication (that is, applying the filter to the image) is performed in the following method:
function applyFilterToPixel(x, y, width) {
    let r = 0;
    let g = 0;
    let b = 0;
    for (let i = 0; i <= 2; i++) {
        for (let j = 0; j <= 2; j++) {
            let n = ((x + i) * width + (y + j)) * 4;
            r += array[n + 0] * currentFilter[j][i];
            g += array[n + 1] * currentFilter[j][i];
            b += array[n + 2] * currentFilter[j][i];
        }
    }

    let nn = (x * width + y) * 4;
    array2[nn + 0] = checkBounds(r / currentFactor);
    array2[nn + 1] = checkBounds(g / currentFactor);
    array2[nn + 2] = checkBounds(b / currentFactor);
    array2[nn + 3] = 255;
}
This must be called for each pixel of the original image. Notice, that we made the two pixel arrays global variables:
let array = [];
let array2 = [];
This is actually a pretty advanced program.
.
Calculator
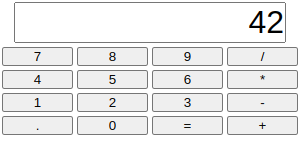
Applications for arrays are really diverse. Very often they save you from having to write a lot of code. A nice example is the calculator from the last chapter. You can of course create the buttons, i.e. JSButtons, all individually, but you can also make it a bit more effective:
const btnNames = ["7", "8", "9", "/", "4", "5", "6", "*",
    "1", "2", "3", "-", ".", "0", "=", "+"];

function setup() {
    ...
    let pnl = new JSPanel('grid', 4);
    addWidget(pnl, 'CENTER');
    for (let i = 0; i < btnNames.length; i++) {
        let btn = new JSButton(btnNames[i]);
        pnl.add(btn);
    }
}
.
TicTacToeLogic
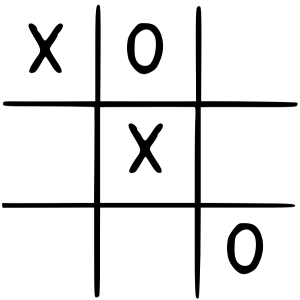
Arrays can also be useful for games. In the fourth chapter we already wrote the UI for the TicTacToe game. Now we are ready to understand the logic part. The playing field can be understood as a two-dimensional array, which is an instance variable that we initialize in the constructor:
class TicTacToeLogic {

    constructor() {
        this.board = [[0,0,0],[0,0,0],[0,0,0]];
    }
	...
}
Originally all values of the playing field are set to 0. If we now mark the squares that player one has occupied with a 1 and the squares that player two has occupied with a 2, then this is a perfect description of the current state of the game.
If we want to test if a certain move is allowed, then we only have to check if the value of the playing field at that position is 0:
isMoveAllowed(player, i, j) {
    if (this.board[i][j] == 0) {
        this.board[i][j] = player;
        return true;
    }
    return false;
}
If we want to test if a player has won, we have to check if one of the players has occupied a whole vertical, horizontal or diagonal row. For the vertical rows the following will do the trick:
checkVerticals() {
    for (let i = 0; i < 3; i++) {
        if ((this.board[i][0] == 1) && (this.board[i][1] == 1)
                                    && (this.board[i][2] == 1)) {
            return true;
        }
    }
    for (let i = 0; i < 3; i++) {
        if ((this.board[i][0] == 2) && (this.board[i][1] == 2)
                                    && (this.board[i][2] == 2)) {
            return true;
        }
    }
    return false;
}
We just go through one column after the other (for-loop) and check if all three values are set to 1 (for player 1) or 2 (for player 2).
.
BattleShip
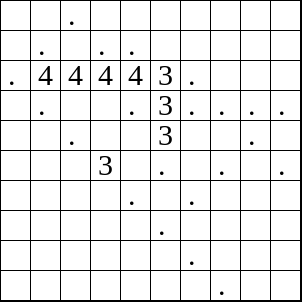
Battleship [7] is another classic game for which arrays are very useful. Our BattleShip game should become a game human versus computer, that means the computer distributes its boats on the playing field and we have to find them.
Just like TicTacToe, we use an array of integers for the playing field:
let board = makeArray(BOARD_SIZE, BOARD_SIZE);
where we dynamically create the array with the makeArray() function:
function makeArray(d1, d2) {
    var arr = [];
    for (let i = 0; i < d2; i++) {
        arr.push(new Array(d1));
    }
    return arr;
}
The ships themselves are represented by numbers: 5 stands for an AircraftCarrier, 4 for a Battleship, 3 for a Submarine or a Destroyer and 2 for a PatrolBoat. To determine how many of each type of ship there are, we can use another array:
const SHIP_SIZES = [5, 4, 3, 3, 2];
That means, if we want to have some more PatrolBoats, just add some more 2's.
In the setup() method,
function setup() {
    ...
    drawLines();
    initBoard();
}
we draw the playing field and initialize the boats. In the initBoard() method we go through the list of ships (SHIP_SIZES) and add one by one using the placeShip(int shipNr, int shipSize) method. This method can be quite simple, if we place the ships just next to each other. However, then the game becomes boring quickly. On the other hand, we can also place the ships randomly, then things get quite complicated, because the ships are not supposed to 'collide'. For us the simple version is fine.
What remains to be implemented is the mousePressed(). We'll use our integer division trick again:
function mousePressed() {
    let i = Math.trunc(mouseX / STEP);
    let j = Math.trunc(mouseY / STEP);
    showLabelAt(i, j);
}
Next, we implement the showLabelAt(int i, int j) method: it checks the board array to see if there is a ship at the location the user selected:
function showLabelAt(i, j) {
    let lbl = new GLabel("" + board[i][j]);
    if (board[i][j] === undefined) {
        lbl = new GLabel(".");
    }
    lbl.setFont("SansSerif-bold-24");
    let x = i * STEP + 7;
    let y = j * STEP + 24;
    add(lbl, x, y);
}
This is another trick that can save you lots of unnecessary code. What's left to do is to draw the label at the position where the mouse was clicked. And that's it.
.
CityAtNight
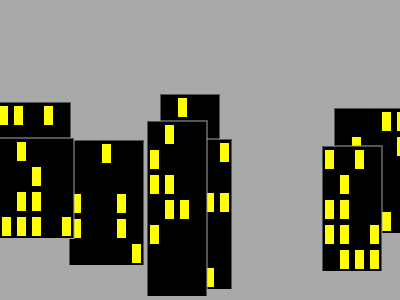
Reuse is a very central concept of object orientation. This can be achieved with inheritance as well as with composition. Let's start with an example for composition. Let's remember chapter 2, where we programmed a skyscraper. If we want to draw a whole city now, it would be very practical if we could reuse our skyscrapers:
const rgen = new RandomGenerator();
function setup() {
    ...
    for (let i = 0; i < 8; i++) {
        let cols = rgen.nextInt(4, 6);
        let rows = rgen.nextInt(4, 8);
        let x = rgen.nextInt(-40, APP_WIDTH - 40); // 120
        let y = rgen.nextInt(APP_HEIGHT / 4, APP_HEIGHT / 2); // 30
        let h = new GSkyscraper(rows, cols);
        add(h, x, y);
    }
}
So we would need a class GSkyscraper to draw a skyscraper. Since a skyscraper consists of several GRects, it makes sense, analogous to the GSmiley, to use a GCompound:
class GSkyscraper extends GCompound {
	...
}
As with any class, we need a constructor
constructor(rows, cols) { {
	...
}
in which we pass the number of window rows and columns we want the skyscraper to have. Depending on whether all skyscrapers should look the same or differently we have to add some randomness to the addWindow() method.
.
SevenSegmentDisplay
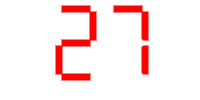
Another nice example of reuse by means of composition is the seven-segment display. Let's remember chapter 2, where we programmed a seven-segment display. If we now need several of these seven-segment displays, e.g. for a counter, a calculator or a clock, then it would be practical if there was a SevenSegmentDisplay class that we could simply use several times, similar to a GRect.
Since a seven-segment display consists of several GRects, it makes sense, similar to the GSmiley, to again use a GCompound:
class SevenSegmentDisplay extends GCompound {
	...
}
As with any class, we need a constructor
constructor(width, height, ledWidth) {
	...
}
in which we ideally specify the width and height of the display, as well as the width of the LEDs. The constructor should then construct the display from GRects.
Really practical would be a displayNumber(char c) method,
displayNumber(c) {
    c = '' + c;
    this.turnAllSegmentsOff();
    switch (c) {
        case '0':
            const code0 = [1, 1, 1, 1, 1, 0, 1];
            this.turnSegmentsOn(code0);
            break;
        case '1':
            ...
    }
}
to which you simply pass a number, and which then displays it. The turnSegmentsOn() method could look like this:
turnSegmentsOn(code) {
    if (code[0] == 1) {
        this.upperFrontVertical.setColor(this.colorOn);
    }
    ...
}
The SevenSegmentDisplay can then be easily used in a graphics program:
function setup() {
    ...
    ssd1 = new SevenSegmentDisplay(40, 80, LED_WIDTH);
    add(ssd1, X_OFFSET + LED_WIDTH, LED_WIDTH);
    ssd2 = new SevenSegmentDisplay(40, 80, LED_WIDTH);
    add(ssd2);
    ssd2.move(X_OFFSET + 40 + 3 * LED_WIDTH, LED_WIDTH);
}
Extension: Instead of the JSTextField you could also use the SevenSegmentDisplay for the Calculator.
.
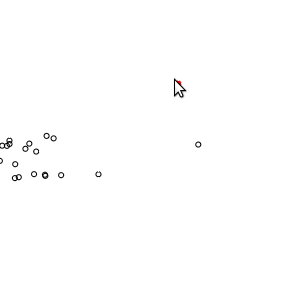
BirdFlocking
Swarming behavior can be observed in fish, birds and many other animals. Interestingly, swarm behavior can be simulated relatively easily. The individuals in a swarm, sometimes called boids, only have to follow three simple rules [11]:
- Separation: keep some distance from your neighbors if you get too close (short range repulsion).
- Alignment: move roughly in the direction of your neighbors.
- Cohesion: move roughly towards the common center of your neighbors (long range attraction).
The simulation is similar to the Planets project (later in this chapter), with the subtle difference that instead of Newton's gravity, the boid rules apply.
.
.
.
GameOfLife
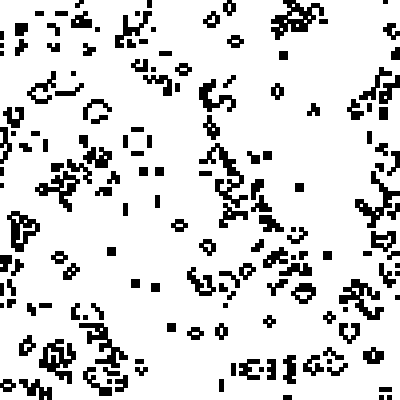
The greatest genius of the last century, John von Neumann, tried to construct a hypothetical machine that could make copies of itself. He succeeded in doing so, but the mathematical model of his machine had very complicated rules. The British mathematician John Horton Conway succeeded in drastically simplifying Neumann's ideas in the early 1970s, now known as Conway's Game of Life [8].
The universe of the Game of Life is a two-dimensional grid of square cells (GRects), each of which can be in one of two possible states: alive (black) or dead (white). Each cell has eight neighbors, and depending on the state of the neighbors, the state in the next round is decided according to the following rules:
- every living cell with less than two living neighbors dies (sub-population),
- every living cell with two or three living neighbors lives,
- every living cell with more than three living neighbors dies (overpopulation), and
- every dead cell with exactly three living neighbors becomes a living cell (reproduction).
.
Mandelbrot
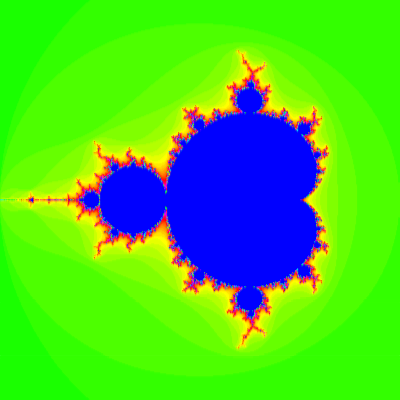
The Mandelbrot set is named after the French mathematician Benoît Mandelbrot. This set is a so-called fractal, but most people just find it pretty [9]. The mathematical equation behind the Mandelbrot set is very simple:
z_n+1 = z_n * z_n + c
where z and c are complex numbers. This equation is an iteration, i.e. if we know z_n, then we can calculate z_n+1. The initial conditions are that z_0 should be zero and c is the point in the complex plane for which the color is to be calculated. So if we think in x- and y-coordinates, then
c = x + i y
is the initial condition. All that is needed is the abort criterion, when should we stop the iteration? Either if z*z >= 4 or if the number of iterations is greater than a maximum value:
while (x * x + y * y < 4 && iteration < MAX_ITERATION) {
    ...
    iteration++;
}
To make the whole thing look nice, we take the number of iterations and encode them in color:
let color = RAINBOW_COLORS[iteration % RAINBOW_NR_OF_COLORS];
RAINBOW_COLORS is a color array that we can initialize at will. Last but not least we need a setPixel() method, which does not exist in the ACM Graphics library. We simply draw little GRects:
function setPixel(x, y, color) {
    let i = (int)(((x - xMin) * WIDTH) / (xMax - xMin));
    let j = (int)(((y - yMin) * HEIGHT) / (yMax - yMin));
    let r = new GRect(1, 1);
    r.setColor(color);
    add(r, i, j);
}
This is not the fastest and most effective way, but it works.
.
Challenges
.
Planets
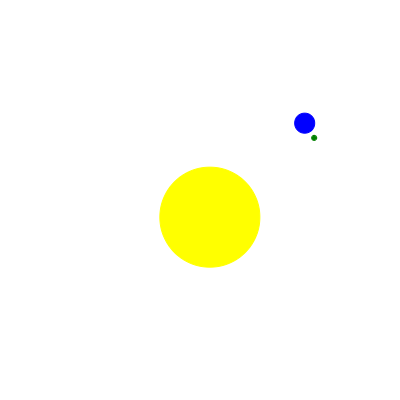
A nice example for reuse by inheritance is a small simulation of the sun-earth-moon system. Visually, planets are nothing more than GOvals. But planets move, i.e. they have a speed. GOvals have no velocity. So we need a GOval with velocity. This is exactly what inheritance can do for us:
class GPlanet extends GOval {
    constructor(size) {
        super(size, size);
        this.vx = 0;
        this.vy = 0;
    }

    move() {
        super.move(this.vx, this.vy);
    }
}
GPlanet is a GOval, but has an additional velocity, i.e., vx and vy. In the constructor we simply call the constructor of the superclass, the constructor of GOval, which creates a GOval with a given height and width. Otherwise we just need a move() method to move our planet.
In our Planets GraphicsProgram we create three planets in the setup(), so
function setup() {
    ...
    // create sun
    sun = new GPlanet(SUN_MASS);
    sun.setFilled(true);
    sun.setColor(Color.YELLOW);
    sun.vy = SUN_SPEED;
    add(sun, (SIZE - SUN_MASS) / 2, (SIZE - SUN_MASS) / 2);

    // create earth
    ...

    // create moon
    ...
}
Here we set the radius of the sun equal to the mass of the sun. That's not entirely true, but not too bad for the simulation. Next we look at the game loop:
function draw() {
    sun.move();
    earth.move();
    moon.move();
    calculateNewVelocities(sun, earth);
    calculateNewVelocities(sun, moon);
    calculateNewVelocities(earth, moon);
    update();
}
As usual in the game loop, we first move the individual planets and then calculate the new velocities. The calculateNewVelocities() method looks a bit complicated, but is nothing else than Newton's law of gravity.
This example shows very nicely that simulations are a little tricky: after the second orbit around the sun, our moon leaves us forever... hasta la vista.
.
AngryCanon
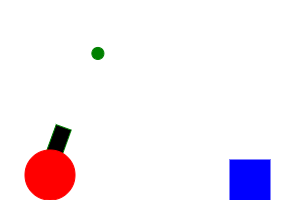
Our next project was inspired by a popular game with birds and pigs. As usual, we need to simplify things a little. The target is a blue GRect, which we should hit with a bullet (green GOval). The bullet is shot by a cannon.
The most difficult thing about this game is the cannon: because we want to be able to change its direction, we need to be able to turn it. However, only the GPolygon offers this functionality, meaning it has a rotate() method. Thus our cannon needs to be a GPolygon. In order for this to look a little more pleasing, we hide part of the cannon behind a red GOval.
In the setup() method we create the cannon and the target.
Next we write the keyPressed() method: here we want to rotate the cannon either left or right depending on the KeyCode,
function keyPressed() {
    switch (keyCode) {
        case LEFT_ARROW:
            angle += 5;
            canon.rotate(5);
            break;
        case RIGHT_ARROW:
            angle -= 5;
            canon.rotate(-5);
            break;
        case 32:
            fireBullet();
            break;
    }
}
If the player presses the space bar we want to fire the bullet. We need the angle angle as an instance variable so that we can set the initial velocity of the bullet when firing:
function fireBullet() {
    if (bullet == null) {
        vx = -Math.sin(angle * Math.PI / 180) * BULLET_SPEED;
        vy = -Math.cos(angle * Math.PI / 180) * BULLET_SPEED;

        bullet = new GOval(BULLET_SIZE, BULLET_SIZE);
        bullet.setColor(Color.GREEN);
        bullet.setFilled(true);
        add(bullet, 50 - BULLET_SIZE / 2, APP_HEIGHT - 30 - BULLET_SIZE);
        sendToBack(bullet);
    }
}
Notice the sendToBack() function, that we call after adding the bullet to the canvas. It changes the z-order of the objects, and makes sure that the collision detection works properly.
The movement of the bullet itself is then calculated in the game loop:
function draw() {
    if (bullet != null) {
        moveBullet();
        collisionWithWalls();
        collisionWithTarget();
    }
    update();
}
In moveBullet() we move the bullet and let gravity do its work:
function moveBullet() {
    bullet.move(vx, vy);
    vy += GRAVITY;
}
If there are collisions with the walls (i.e. up, right, left or down), the bullet simply disappears:
removeObj(bullet);
bullet = null;
If there are collisions with the blue target, the bullet and the target disappear, and the game is over.
.
FlappyBall
This project is inspired by a game with a bird. However, our bird is just a GOval. We can control the bird with the keyboard, more precisely the space bar. And the bird has to fly through an obstacle, two moving GRects.
For the game we need a bird (ball) and a two-part wall as instance variables:
let ball;
let upperWall;
let lowerWall;
In setup() we initialize them: The ball is placed in the middle, the two rectangles to the right edge. The position of the gap should be random, but the width of the gap should be twice the diameter of the ball.
Next follows the game loop:
if (alive) {
    moveBall();
    moveWall();
    checkForCollision();
    update();
}
The ball only moves up or down. Normally gravity acts on it, so it usually falls down. The wall moves with constant speed from right to left. When it reaches the left edge of the screen, it simply disappears and a new wall appears on the right edge.
As far as collisions are concerned, we have to check for collisions with the walls: if there is one, the game is over. In case of collisions with the ground, it makes sense to simply set the ball speed to 0 and position the ball at the bottom of the screen.
Still thinking about what to do when the space bar is pressed? This is surprisingly simple:
function keyPressed() {
    ballVel = -3.0;
}
.
SpeedRace
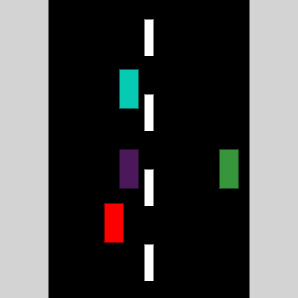
The first version of Speed Race appeared in 1974 written by Tomohiro Nishikado, the author of Space Invaders [10]. In a nutshell, it is GTA 0.1, a car racing game of the first generation. It's interesting how easy it is to outsmart the brain: just a few white rectangles that move from top to bottom, and you think you're driving on a road!
The game actually consists of a whole lot of rectangles. The first is the road: it consists of two parts: a large black rectangle that does nothing and the middle lane that consists of several (five) white rectangles that move at a constant speed from top to bottom.
This is followed by your own car: a red rectangle that can only be steered to the left and right. And finally the other cars (otherCars): they are only colored rectangles, which also move from top to bottom through the screen. In setup() all the rectangles are created, notice that the order they are added makes a difference in appearance.
The code for the game loop is also limited:
function draw() {
    moveRoad();
    moveCars();
    checkForCollisionCarsWithWall();
    update();
}
First we move the road. This is actually totally trivial if we remember our friend the remainder operator:
function moveRoad() {
    for (let i = 0; i < NR_OF_LANES; i++) {
        middleLane[i].move(0, CAR_SPEED);
        let x = middleLane[i].getX();
        let y = middleLane[i].getY() + LANE_LENGTH;
        middleLane[i].setLocation(x, y % SIZE - LANE_LENGTH);
    }
}
No need for an if-else. Even easier is moveCars(), we simply move one car after the other. In checkForCollisionCarsWithWall() we just want to find out if one of the otherCars has left the screen below: then we simply send it to the top again, but at a different, random x-position.
Remains the keyPressed() method: if the player presses the left arrow key (keyCode = 37), then we simply move the car to the left by 5 pixels, if he presses the right arrow key (keyCode = 39), we move it to the right by 5 pixels. Could have been more complicated.
.
GeometryRun
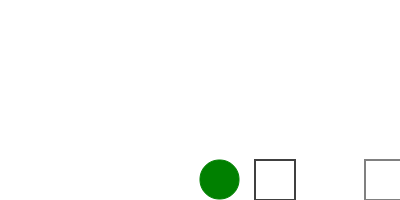
Most of us have suffered permanent brain damage from math lessons at school, so in general we avoid geometric objects like the plague. The point of this game is that we (a green GOval) must avoid colliding (using the space bar) with the incoming geometric objects (GRects) at all cost.
As usual, we first consider which instance variables are necessary:
let obstacles = [];
let runner;
The Geometry class is simply a GOval, the GeometryObstacle is a GRect. Both have their own velocity:
class GeometryObstacle extends GRect {

    constructor() {
        super(OBSTACLES_SIZE, OBSTACLES_SIZE);
        this.vx = 0;
        this.vy = 0;
    }

    move() {
        super.move(this.vx, this.vy);
    }
}
Let's continue with our game, we start with the setup(): we initialize the runner and the obstacles. We place the runner in the middle and the obstacles at the bottom of the screen, at a random x-positions. And we must not forget to add the KeyListener.
The game loop is very simple again:
function draw() {
    moveObstacles();
    moveDash();
    checkForCollision();
    update();
}
The obstacles move with constant speed from right to left, and on the runner only gravity acts. The checkForCollision() method must ensure that obstacles that disappear on the left, appear on the right again, and it should also detect collisions between our runner and the obstacles.
Remains the keyPressed() method: whenever the spacebar is pressed, the y-speed of the runner should get a small push:
function keyPressed() {
    if (keyCode == 32) {
        runner.vy -= DASH_JUMP;
        runner.move();
    }
}
That's it.
.
JumpAndRun
GeometryRun is a typical jump-and-run game. Donkey Kong [13] was one of the first known games of this genre, also known as "platform game" [12]. What makes jump and run games different is that there are different types of objects and that there are different levels.
In our JumpAndRun project we need the following global variables:
let ball;
let movingObject = new Array(Math.trunc(400 / BALL_DIAM + 1));
We have a ball for the player and the movingObjects are an array of GObjects. These could be GOvals, GRects, or any other GObjects. We determine the GObject from the string world:
let world = " RRRR O RO OOO R";
If the string contains an 'R', a GRect is to be created at the position, a GOval for an 'O', and a space is nothing. That means we can describe different levels with different world strings. And a level editor would do nothing else but edit this string.
What does the setup() method do? It creates the ball and creates the world. Here the createNewObjects() method may be helpful:
function createNewObjects() {
    for (let i = 0; i < movingObject.length; i++) {
        switch (world.charAt(i)) {
            case 'R':
                let rect = new GRect(APP_WIDTH + i * BALL_DIAM, Y_START, BALL_DIAM, BALL_DIAM);
                rect.setColor(rgen.nextColor());
                rect.setFilled(true);
                rect.setFillColor(rgen.nextColor());
                movingObject[i] = rect;
                add(movingObject[i]);
                break;
            case 'O':
                ...
            default:
                movingObject[i] = null;
                break;
        }
    }
}
The game loop is identical to the one in the last project. What is different is the checkForCollisionWithObjects() method:
function checkForCollisionWithObjects() {
    let obj = getElementAt(ball.getX() + BALL_DIAM / 2, ball.getY()
        + BALL_DIAM + 1);
    if ((obj != null)) {
        if (obj instanceof GRect) {
            ballVel = 0.0;
            ball.setLocation(X_START, APP_HEIGHT - 2*BALL_DIAM - BALL_OFFSET);
        } else {
            alive = false;
        }
    }
}
because depending on the type of object, different things should happen: we can stand on GRects, but when we come in contact with GOvals, we die.
.
MinesClone
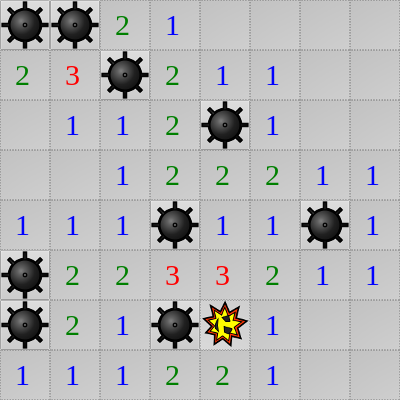
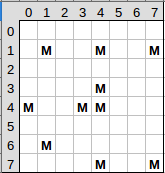
We've all played MineSweeper (or Mines) before. The game is about finding hidden mines without detonating them [14].
1. Playing Field
The first question we have to ask ourselves: how do we want to represent the playing field? One possibility is a two-dimensional array:
let field = makeArray(FIELD_SIZE, FIELD_SIZE);
where we use the following function to create the array, basically it is an array of arrays:
function makeArray(d1, d2) {
    var arr = [];
    for (let i = 0; i < d2; i++) {
        arr.push(new Array(d1));
    }
    return arr;
}
In the initialzeField() method we initialize this array with strings representing the content of each cell. For instance, an 'M' could represent a mine and a space ' ' means that the cell is empty:
function initialzeField() {
    let rgen = new RandomGenerator();
    for (let i = 0; i < MinesConstant.NUMBER_OF_MINES; i++) {
        let x = rgen.nextInt(0, MinesConstant.FIELD_SIZE - 1);
        let y = rgen.nextInt(0, MinesConstant.FIELD_SIZE - 1);
        field[x][y] = 'M';
    }
}
2. Mines in the Area
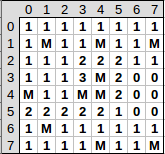
After we have hidden the mines, we have to count how many mines are in the respective environment of a cell. Of course we can do that ourselves, but we may also use the following method:
MinesHelper.countMines(field);
This method takes our field array as parameter and modifies it. This is possible because arrays are passed by references, i.e. in the original. Each cell (except mines) then contains the number corresponding to the number of adjacent mines:
|
|
|
3. Display Playing Field
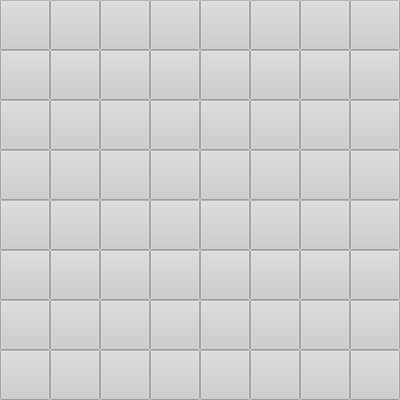
Now that our data structure (the array) is in place, we continue with the graphical part. First, we write the drawInitialField() method. Since in the beginning all cells are still hidden, this is quite simple, we simply draw 8 * 8 "initial.png" images. For this we use the GImage class:
img = new GImage("Pr7_Asteroids/initial.png");
add(img, i * PIXEL_PER_TILE, j * PIXEL_PER_TILE);
Our game looks already quite similar to the original.
4. MouseEvents
To be able to react to mouse clicks we need to implement the mouseClicked() method. When the mouse is clicked, the first step is to find out which cell the player clicked on. Here our old friend integer division helps us:
let x = Math.trunc(mouseX / MinesConstant.PIXEL_PER_TILE);
let y = Math.trunc(mouseY / MinesConstant.PIXEL_PER_TILE);
With these coordinates we can check in our array field[x][y] what is there:
if (field[x][y] == 'M') {
    ...
} else if (field[x][y] == '0') {
    ...
} else {
    ...
}
If the player clicked on a mine, the game is over. In this case you could write a method drawWholeField() that exposes the entire playing field. Otherwise, we should call the drawOneTile(x, y) method, which draws the correct image for this cell at x,y, i.e. the image of a mine ("mine.png"), if it is a mine, or the image for the empty field ("empty.png") superimposed with a GLabel indicating the number of adjacent mines. If you want, you could also give the GLabel the matching color from the LABEL_COLORS[] array.
5. Marking of Cells
One important aspect is still missing in our MinesClone: the marking of cells as potential mines. In the original this can be done with the right mouse button. This is actually quite simple, because the MouseEvent contains the information which of the mouse buttons was pressed:
if (mouseButton === CENTER) { ... }
If the player has pressed the third mouse button, i.e. the right one, then the image "marked.png" should be drawn at the corresponding position. As with the previous example, also in MinesClone we want to use an interface (MinesConstant) to store all our constants.
Extensions
You could write a method discoverEmtpyTiles(): if the player clicks on an empty tile, then all empty surrounding tiles could be uncovered.
.
Asteroids
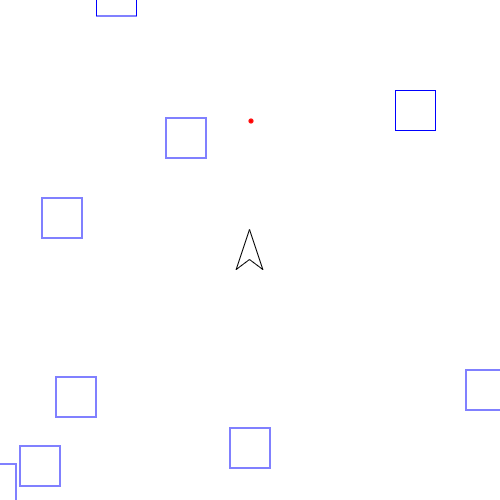
According to Wikipedia "Asteroids is one of the greatest successes of all time in the history of computer games" [15]. This should not deter us from developing our own version of Asteroids. The game is about flying through an asteroid field with a spaceship. And of course it's about not colliding with the asteroids.
1. Pre-existing Classes
If we want to develop the game in a reasonable amount of time, we may want to use some pre-existing classes:
- GAsteroid: is a GRect with speeds vx and vy, as well as a move() method.
- GBullet: is a GOval, otherwise identical to GAsteroid.
- GSpaceShip: is a GPolygon, just like GAsteroid it has speeds vx and vy, as well as a move() method. Additionally it can spin, rotate(), and accelerate via startEngine().
If we take a closer look at the MarsLander project, then these classes are really nothing new. We include them at the top of our code:
include("Pr7_Asteroids/GAsteroid.js");
include("Pr7_Asteroids/GBullet.js");
include("Pr7_Asteroids/GSpaceShip.js");
We also need to declare several constants:
const FPS = 25;
const APP_WIDTH = 400;
const APP_HEIGHT = 400;
const NR_OF_ASTEROIDS = 10;
const ASTEROID_SIZE = 40;
const ASTEROID_MAX_SPEED = 5;
const SPACE_SHIP_SIZE = 20;
const SPACE_SHIP_SPEED = 3;
const BULLET_SIZE = 4;
const BULLET_SPEED = 10;
In the setup() method we initialize the ship and the asteroids. The ship launches from the center of the screen. As for the asteroids, there are supposed to be ten of them, they are blue and randomly distributed. Their speeds should be random:
function createAsteroids() {
  for (let i = 0; i < NR_OF_ASTEROIDS; i++) {
    asteroids[i] = new GAsteroid(rgen.nextInt(APP_WIDTH),
      rgen.nextInt(APP_HEIGHT));
    asteroids[i].vx = rgen.nextInt(-ASTEROID_MAX_SPEED,
      ASTEROID_MAX_SPEED);
    asteroids[i].vy = rgen.nextInt(-ASTEROID_MAX_SPEED,
      ASTEROID_MAX_SPEED);
    asteroids[i].setColor(Color.BLUE);
    // asteroid.setFilled(true);
    add(asteroids[i]);
  }
}
2. Game Loop
The game loop for Asteroids is only slightly more complicated than our other projects:
function draw() {
  if (spaceShip !== undefined) {
    moveSpaceShip();
    moveAsteroids();
    moveBullet();
    checkForCollisions();
  }
  update();
}
In the game loop in each iteration we first move the spaceship, then the asteroids, followed by the bullet, if one is fired. And of course we have to check all possible collisions, more about that later.
3. Key Events
The spaceship is controlled by the keyboard, so we have to implement the keyPressed() method:
function keyPressed() {
  switch (keyCode) {
    case UP_ARROW:
      spaceShip.startEngine();
      break;
    case 32:
      ...
  }
}
If the player presses the up key (38), then the spaceship should accelerate (startEngine()), if she presses the left key (37), the spaceship should turn 10 degrees to the left, if she presses the right key (39), then the spaceship should turn 10 degrees to the right, that is -10 degrees.
So far so good. If we test our game now, the asteroids should fly around, and our spaceship should be able to spin and accelerate.
What's still missing is our self-defense: if we press the spacebar, the spaceship should fire a bullet. So we need another entry in the keyPressed() method: if the player presses the spacebar, then the method fireBullet() should be called. In fireBullet() we create a new GBullet at the position of the spaceship, and with the following velocities:
function fireBullet() {
  if (bullet === undefined) {
    bullet = new GBullet(spaceShip.getX(), spaceShip.getY());
    bullet.vx = Math.sin(spaceShip.angle) * BULLET_SPEED;
    bullet.vy = -Math.cos(spaceShip.angle) * BULLET_SPEED;
    add(bullet);
    sendToBack(bullet);
  }
}
A little test should verify that we can fire bullets now. Notice the sendToBack(), that makes sure collision detection works properly.
4. Collisions
The collisions make the game interesting. All in all, there are five different ones:
function checkForCollisions() {
  checkForCollisionAsteroidsWithWall();
  checkForCollisionSpaceShipWithWall();
  checkForCollisionBulletWithWall();
  checkForCollisionBulletWithAsteroid();
  checkForCollisionAsteroidWithSpaceShip();
}
The collisions with the wall are the easiest. Both the spaceship and the asteroids should simply reappear on the opposite side of the screen when they leave the screen. If the ball leaves the screen, it should simply disappear:
removeObj(bullet);
bullet = undefined;
To detect collisions between the bullet and an asteroid, we use the getElementAt() method: if there is a GObject where the bullet is, then that must be an asteroid. We then remove the asteroid and the bullet:
removeObj(obj);
removeObj(bullet);
bullet = undefined;
Very important, we do not set obj to undefined (why?)!
There are still collisions between spaceship and asteroids: for the spaceship they are catastrophic, because they lead to the end of the game. We'll just set the spaceship to null,
removeObj(obj);
removeObj(spaceShip);
spaceShip = undefined;
and that ends the game loop.
Extensions
We can think of a lot of extensions to our Asteroids game:
- Game over: we could write a method displayGameOver() that displays a big text (SansSerif-36) in the middle of the screen.
- Hyperspace: the player can also send the spaceship into hyperspace: it then simply reappears at a random location on the screen. Of course, there is a risk of self-destruction if it reappears within an asteroid.
- Prettier asteroids: in the real game, the asteroids are not just GRects, but pretty GPolygons. All we have to do is modify the GAsteroid class so that the asteroids look like those in the real game.
- Splitting asteroids (hard): in the real game the asteroids do not just disappear when they are hit by a bullet, but they halve themselves. The smaller parts then move at different speeds in different directions. This is very hard to do with an arrays, but if you use an ArrayList (next chapter), it is actually not that hard.
.
Questions
-
Name two characteristics of an object-oriented language.
-
Give an example for inheritance
- Declare an array of numbers with five elements containing the numbers from 1 to 5.
.
References
References from Chapter 2 also form the basis of this chapter. Further details on many of the projects can be found in Wikipedia.
[1] Taj Mahal, Wikipedia, https://en.wikipedia.org/wiki/File:Taj_Mahal_(Edited).jpeg, Author: Yann; edited by Jim Carter, License: Creative Commons Attribution-Share Alike 4.0
[2] Three algorithms for converting color to grayscale, www.johndcook.com/blog/2009/08/24/algorithms-convert-color-grayscale/
[3] Steganographie, https://de.wikipedia.org/wiki/Steganographie
[4] RAID, https://de.wikipedia.org/wiki/RAID
[5] GNU Image Manipulation Program, Faltungsmatrix, http://docs.gimp.org/de/plug-in-convmatrix.html
[6] Giordano Bruno, https://de.wikipedia.org/wiki/Giordano_Bruno
[7] Schiffe versenken, https://de.wikipedia.org/wiki/Schiffe_versenken
[8] Conways Spiel des Lebens, https://de.wikipedia.org/wiki/Conways_Spiel_des_Lebens
[9] Mandelbrot-Menge, https://de.wikipedia.org/wiki/Mandelbrot-Menge
[10] Tomohiro Nishikado, Speed Race, https://en.wikipedia.org/wiki/Tomohiro_Nishikado#Speed_Race
[11] Flocking (behavior), https://en.wikipedia.org/wiki/Flocking_(behavior)#Flocking_rules
[12] Platform game, https://en.wikipedia.org/wiki/Platform_game
[13] Donkey Kong (Arcade), https://de.wikipedia.org/wiki/Donkey_Kong_(Arcade)
[14] Minesweeper, https://de.wikipedia.org/wiki/Minesweeper
[15] Asteroids, https://de.wikipedia.org/wiki/Asteroids
.
 Try it
 Try it
 Try it
 Try it
 Try it
 Try it
 Try it
 Try it
 Try it
 Try it
 Try it
 Try it
 Try it
 Try it
 Try it
 Try it
 Try it
 Try it
 Try it
 Try it
 Try it
 Try it
 Try it
 Try it
 Try it
 Try it
 Try it
 Try it
 Try it
 Try it
 Try it
 Try it