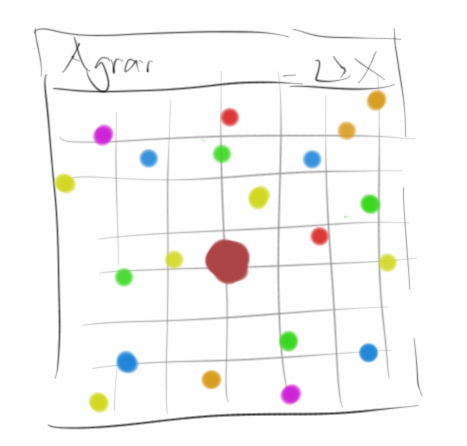
Agrar
In the last chapter we have neglected the top-down approach at the expense of variables, but in this chapter we will see how to get back to the top-down approach with functions. And we will write our first animations and games. It promises to get interesting.
.
Functions
We have known functions for a quite a some time now. With Karel we called them commands, e.g. move(), turnLeft() and frontIsClear(). Also in graphics programs we used them, at that time we called them messages that we send to a GRect, e.g. setColor() and setFilled(). Even with console programs we had them, e.g. readInt() and println(). So nothing new.
With Karel there was the cool possibility to create new commands, like turnRight() or moveToWall(). That's what we did back then:
function turnRight() {
    turnLeft();
    turnLeft();
    turnLeft();
}
Wouldn't it have been cool if we could have had the following new command in our Archery program?
function drawCircle( radius, color ) {
	...
}
Or for our Wall program, a function like the following would have been quite practical:
function drawRowOfNBricks( numberOfBricks ) {
	...
}
Well, the nice thing is, this actually is possible!
SEP: Functions always do something, they convey an action, so functions should always be verbs.
.
Defining Functions
Creating a new function is as easy as teaching Karel new commands. The general syntax of a function declaration is as follows:
function name( parameters ) {
	... body...
}
where we mean by
- name: the name of the function, here the same rules apply as for variables and function names should always be written in lower case,
- parameters: parameters are new, they did not exist with Karel, but they are very practical as we will see soon.
.
Exercise: Archery
Let's take another look at our Archery program. But now we try using the drawCircle(radius, color) function. We will find that the code becomes much shorter and also more readable.
function drawCircle(radius, color) {
    let ring = new GOval(2 * radius, 2 * radius);
    ring.setColor(color);
    ring.setFilled(true);
    let x = 50 + 72 - radius;
    add(ring, x + 25, x - 48);
}
.
Exercise: Wall
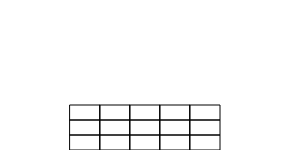
Let's try the Wall program again, using the help of functions. We want to build a wall consisting of 15 bricks (GRect). However, we want to use the function
function drawRowOfNBricks(j) {
    let x = 70; // beginning x position of wall
    let y = 108 + j * 15; // beginning y position of wall
    for (let i = 0; i < 5; i++) {
        let brick = new GRect(30, 15);
        add(brick, x, y);
        x = x + 30;
    }
}
Question: Does the function above contain magic numbers? Can we change that?
.
Return Value
So far we have only seen functions that return nothing. But there are also functions that give something back. Most of the time the functions calculate something and return the result as a return value. A nice example is the following function that returns how many inches there are in a given number of feet:
function feetToInches(feet) {
    let inches = 12 * feet;
    return inches;
}
We can use this function in a console program.
.
Exercise: ConvertFeetToInches
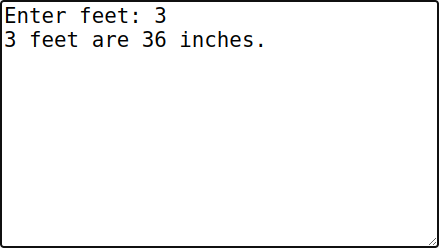
We want to write a small console program that converts feet to inches. It asks the user for the number of feet using readDouble() and then calls our feetToInches() function and returns the result in the console window.
let feet = await readDouble("Enter feet: ");
let inches = feetToInches(feet);
println(feet + " feet are " + inches + " inches.");
If we look closely, we see that we use the feetToInches() function in the same way as the readInt() or println() functions. The only difference is that we wrote it ourselves.
.
Objects as Return Value
We can not only return numbers, but every possible data type, including GOvals for instance. The following function generates a colored filled circle with a given radius r at positions x and y:
function createFilledCircle(x, y, r, color) {
    let circle = new GOval(x-r, y-r, 2*r, 2*r);
    circle.setColor(color);
    circle.setFilled(true);
    return circle;
}
All we have to do now is add it to our Archery program.
.
Local Variables
The variables we have been dealing with so far are called local variables. Local with respect to a function. This means that variables are only visible inside the function in which they were declared, outside, that is, in other functions they are not visible or accessible. Let's look at an example:
async function setup() {
    createConsole();

    let feet = await readDouble("Enter feet: ");
    println(feet);
}

function feetToInches() {
    let inches = 42;
    println(inches);
}
In this example there is a variable called feet that exists inside the function setup() and a variable inches that exists in the function feetToInches(). If we try to access the variable feet in the function feetToInches(), then this is not possible. The same applies the other way round. The variables are therefore only visible locally in their respective functions.
How can we pass variables from one function to another function? That's what parameters are for:
function feetToInches(feet) {
    let inches = 12 * feet;
    println(inches);
}
We pass variables from one function to another using these parameters.
However, only a copy of the variable is passed. To see this, let's have a quick look at the following program:
async function setup() {
    createConsole();

    let feet = await readDouble("Enter feet: ");
    feetToInches(feet);
    println(feet);
}

function feetToInches(feet) {
    feet = 42;
}
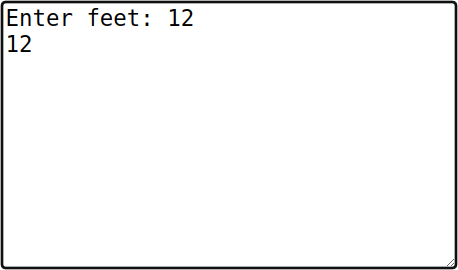
First we ask the user to give us a value, e.g. '12'. We pass this value to the feetToInches() function. Now inside that function, we reassign feet to a new value, say feet = 42. But this reassignment only applies to the copy, the original remains unchanged, as we see when we look at what is displayed in the console window. The original feet still has the value '12', i.e., it was not changed.
That's why it doesn't really matter whether we call the red feet also feet or give it another name:
async function setup() {
    createConsole();

    let feet = await readDouble("Enter feet: ");
    feetToInches(feet);
    println(feet);
}

function feetToInches(fritz) {
    fritz = 42;
}
This will hopefully make clear why we need return values. Because if something is calculated in the function feetToInches(), then this is only visible locally inside that function. To get it back out into the calling function, we need the return value.
As a note, a function can have several parameters, but it can only have one return value.
.
Animation
Now we have functions in our toolbox. That's great, because we can start doing really cool things with them, namely animations and games. We'll start with animations. But for that we need one more thing.
.
GObject
Let's remember the graphics classes we know already: GRect, GOval, GLine, GImage, GLabel, GArc and GPolygon. These classes are not completely independent of each other, they even have something in common: they are all GObjects.

The class GObject is also called a parent class. We say that the child classes such as GRect and GOval inherit from their parent class. What do they inherit? The functions of the parent class. That's super convenient, as we'll see. But first let's take a look at those inherited functions:
- setLocation(x, y): move the GObject to the position x, y.
- move(dx, dy): move the GObject by dx and dy.
- getX(): returns the x coordinate of the GObject.
- getY(): returns the y coordinate of the GObject.
- getWidth(): returns the width of the GObject.
- getHeight(): returns the height of the GObject.
- setColor(col): changes the color of the GObject.
All the graphic classes we've seen so far have these functions.
.
Animations using the Game Loop
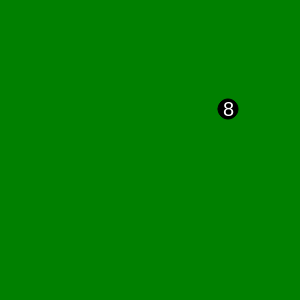
For our first animation we choose billiard: We want a black ball to move across a green table and bounce back from the sides.
Every animation has a game loop. The game loop is our draw() function, which we have been ignoring up to this point:
let ball;

function setup() {
    createCanvas(300, 300);
    frameRate(25);
    setBackground(Color.GREEN);

    ball = new GOval(20, 20);
    ball.setFilled(true);
    add(ball, 150, 150);
}

function draw() {
    ball.move(4, -3);
    update();
}
Everything that has to do with the setup and initialization goes in the setup() function. Then the game loop starts: if we set the frame rate to 25, then the draw() function is called 25 times per second, or every 40 ms.
Let us go through the functions in detail. In the setup() function we set the size of the window, then we set the framerate to 25 and the background color to green. Finally, we create a ball:
function setup() {
    createCanvas(300, 300);
    frameRate(25);
    setBackground(Color.GREEN);

    ball = new GOval(20, 20);
    ball.setFilled(true);
    add(ball, 150, 150);
}
What should stand out here is that it is "ball =" and not "let ball =". More on that in a moment. The next function is the draw() function:
function draw() {
    ball.move(4, -3);
    update();
}
We simply tell the ball to move. And the update() we need for the drawing to happen.
So what is the problem with the ball? Well, remember local variables: a variable declared inside a function is only valid in that function. So if we declare ball inside setup(), then it is only available inside setup(), but not draw(). If we declare it in draw(), then we create 25 balls per second, because draw() is called 25 time per second. But we do not need 25 or more balls, we need only one. We need one that is shared by both functions, or that can be accessed from within both functions. The solution is simple: just declare the ball outside the functions. This is what we call a global variable.
.
Exercise: Billiards
Once we know about global variables, we might as well us them. We need a ball and its velocities, hence we declare them as global variables:
// global variables
let ball;
let vx = 4;
let vy = -3;
The setup() function stays the same as above. But we want to change the draw() function a little. First, we want to return to our top-down approach:
function draw() {
    moveBall();
    checkForCollisionsWithWall();
    update();
}
Meaning we introduce two functions, called moveBall() and checkForCollisionsWithWall(). The first one is easy:
function moveBall() {
    ball.move(vx, vy);
}
The second one is a little more complicated:
function checkForCollisionsWithWall() {
    let x = ball.getX();
    let y = ball.getY();
    if ((x < 0) || (x > WIDTH)) {
        vx = -vx;
    }
    if ((y < 0) || (y > HEIGHT)) {
        vy = -vy;
    }
}
We get the current x- and y-position of the ball and test if it is inside the playing field. If not, we change the sign of the speed, i.e., the ball turns around. If you want, you could reduce the speed a little with every collision, but we don't.
Let's talk a little more about ball, vx and vy. So far we only know about local variables. The problem with local variables is that they are only valid within one function. In our billiard example, however, we need the ball in three functions: the setup(), the moveBall(), and the checkForCollisionsWithWall() functions. Obviously we cannot use a local variable for the ball (and also vx and vy). Instead, we use a global variable. Global variables are declared at the beginning of a class, before the setup() function, and most importantly, outside the setup() function (or any other function). The advantage of global variables is that they are accessible in any function. However, global variables are a little dangerous, as we will see later, hence the following SEP.
SEP: When possible try to use local variables.
.
Events
So animations are not really that difficult. Let's move on to games: our games should be controllable with the mouse. To do this, we have to tell our program that we are interested in mouse events such as whether the mouse button was pressed or the mouse was moved. In code all we have to do add the mousePressed() function to our program:
function mousePressed() {
    let x = mouseX;
    let y = mouseY;
    ...
}
The variables mouseX and mouseY contain the x- and y-position of the mouse. Similarily, if we want to find out if the mouse has moved, we implement the mouseMoved() function. Of course we can also use both. On mobile devices, like Android or iPad, the corresponding functions are called touchPressed() or touchMoved().
.
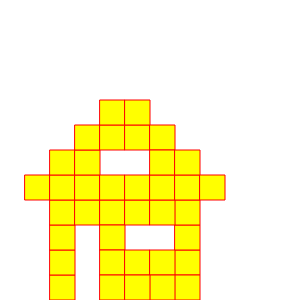
Exercise: Builder
Builder is inspired by Lego: we have small blocks and we can place them anywhere on the screen by clicking with the mouse on the position where the block should go. The program code for this is totally simple. The setup() and draw() functions do not really do anything:
function setup() {
    createCanvas(WIDTH, HEIGHT);
    frameRate(5);
}

function draw() {
    update();
}
But in the mousePressed() function all the action happens:
function mousePressed() {
    let x = mouseX;
    let y = mouseY;
    x = Math.trunc(x / BLOCK_SIZE) * BLOCK_SIZE;
    y = Math.trunc(y / BLOCK_SIZE) * BLOCK_SIZE;

    let block = new GRect(BLOCK_SIZE, BLOCK_SIZE);
    block.setColor(Color.RED);
    block.setFilled(true);
    block.setFillColor(Color.YELLOW);
    add(block, x, y);
}
To get the x- and y-position of the mouse we use the mouseX and mouseY variables. Once we have those, we create a new GRect and place it at the current mouse position.
With a little trick, we can "quantize" the position of the blocks:
x = Math.trunc(x / BLOCK_SIZE) * BLOCK_SIZE;
This is a trick you will see again and again.
.
Exercise: MouseTracker
Next we want to track the mouse movement. We start again with the setup() function:
// global variables
let lbl;

function setup() {
    createCanvas(300, 200);
    frameRate(25);

    lbl = new GLabel("");
    lbl.setFont('Arial');
    lbl.setFontSize(20);
    add(lbl, 0, 0);
}
To display the position of the mouse we want to use a GLabel called lbl. It is an global variable and must be initialized and added to our canvas. After that we tell our program again that we want to listen to mouse events. In this example we want to know if the mouse has moved, so we overwrite the mouseMoved() function:
function mouseMoved() {
    let x = mouseX;
    let y = mouseY;
    lbl.setLabel("x=" + x + ",y=" + y);
    lbl.setLocation(x, y);
}
We get the x and y position of the mouse, change the text of the label with the setLabel() function, and move the label to the mouse position with the setLocation() function. And that's it.
.
RandomGenerator
For many games we need random numbers. To get random numbers we use the class RandomGenerator. This class does not only generate random numbers, but it can also generate random colors. The code
let rgen = new RandomGenerator();
...
let width = rgen.nextDouble(0, 150);
let col = rgen.nextColor()
shows how to generate random numbers and random colors. Two other useful functions are nextInt(low,high) and nextBoolean().
.
Canvas
At this point it makes sense to talk a little more about our canvas. We have been using it all the time, when we were adding our GObjects to our programs, like
add(lisa, 70, 50);
The question we should have asked ourselves back then was: where to do we add those GRects and GOvals? The answer is of course: to the canvas. The canvas is our felt board from kindergarten. If we can add something, the next question is, can we also remove something? Or are there other things we can do with the canvas? Well, the following lists the things we can do with and to the canvas:
- add(object): add a GObject to the canvas.
- add(object, x, y): add a GObject to the canvas at position x, y.
- addAtEnd(object, x, y): add a GObject to the canvas at position x, y.
- remove(object): remove the GObject from the canvas.
- removeAll(): remove all GObjects from the canvas.
- sendToFront(): bring the GObject to the front (z-order).
- sendToBack(): send the GObject to the back (z-order).
- getElementAt(x, y): return the first GObject at the position x, y, if there is one.
- getElementsAt(x, y): return all GObjects at the position x, y, if there is any.
- setBackground(c): change the background color of the canvas.
.
Review
It may seem that we didn't do all that much in this chapter. But that's not true at all: as we will see in the projects, we can already program really cool things. We now know what
- functions,
- parameters,
- return values,
- and local variables
are. In addition, we learned more about
- GObjects,
- the canvas,
- and the RandomGenerator.
The most important thing in this chapter however was that we can do animations using the game loop and listen to mouse events.
.
Projects
The projects in this chapter are real fun. Let's get started.
.
Stairs
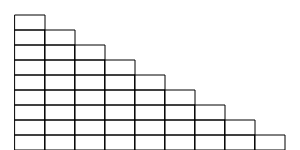
Our first project is a small staircase. The problem is very similar to the Wall problem. Therefore, it makes sense to adopt the top-down approach here as well - write a function called drawRowOfNBricks( n ). We should also be careful not to use magic numbers, only constants.
.
.
Pyramid
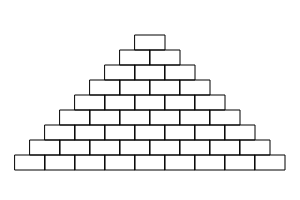
The pyramid is almost identical to the stairs. The only difference is that the steps are always offset by half a stone. The pyramid should have nine stones in the bottom row. For this, we need to change the code from the last example only slightly.
.
.
.
.
ChessBoard
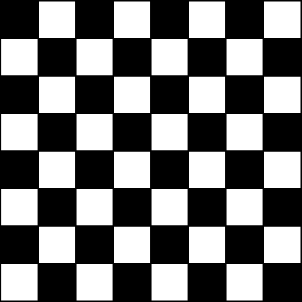
Let's get back to our chessboard. But this time we want to use the top-down approach. There are several approaches, but one would be to declare a function called drawOneRow(). Here you have to consider exactly which parameters you pass to the function. You could also have two functions, one for even lines and one for odd lines.
.
.
.
.
.
.
RGBColor
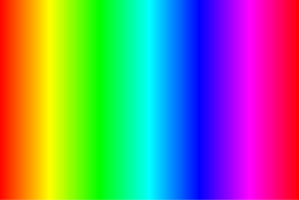
We have already drawn the rainbow, but still rather "manually". Now we want to draw the HSV color palette [5]. In JavaScript you can create any color using
let col = color(r, g, b);
where the variables r, g, and b each represent the red, green and blue components. These must have values between 0 and 255. So for instance, red color can be made like this
let colRed = color(255, 0, 0);
If we look closely at the colors in the HSV color palette, we notice that it starts with red, then yellow, green, cyan, blue, magenta, returning to red. Hence, there are a total of six color transitions. The first transition from red to yellow could be reached with the following lines:
for (int x = 0; x < 255; x++) {
    let col = color(255, x, 0);
    let line = new GLine(x, 0, x, HEIGHT);
    line.setColor(col);
    add(line);
}
.
Moire
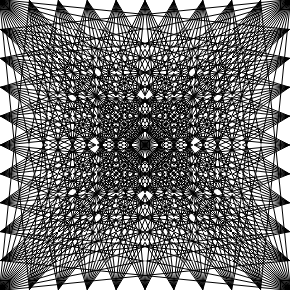
The Moiré effect [6] is usually rather undesirable, but it can also be quite pretty. First we divide the length and width into equal parts, e.g. eleven parts. Then we draw a line from each point above to each point below and the same from left to right. To get a feeling for how this works, take a piece of paper and try to draw it by hand. It comes down to two nested for loops.
.
.
.
.
.
.
RandomSquares
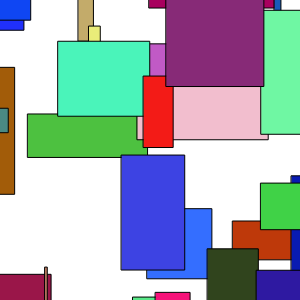
Let's continue our artistic activities. We want to draw rectangles of different colors of random size and position. Of course we use the random generator. First we set a random width and height for a GRect. Width and height should perhaps not be too large or too small. Then we give the rectangle a random color with
rect.setFillColor(rgen.nextColor());
Finally, we place the GRect at a random x and y position. We place this code in the draw() function and maybe change the frame rate to 10 or less.
.
.
.
TwinkleTwinkle
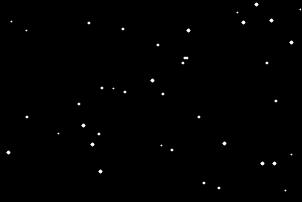
TwinkleTwinkle is about generating a random night sky. The stars are GOvals with a random size between 1 and 4 pixels. They're distributed randomly on the canvas. It makes sense to first set the background to black using
setBackground(Color.BLACK);
The whole thing then comes into the game loop and we wait perhaps 500 ms until we draw the next star.
.
.
Confetti
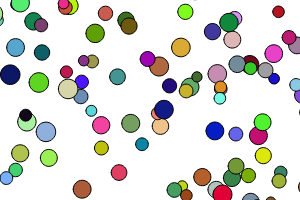
We all love confetti. They are very easy to make, either with a hole punch or with GOvals. The confetti can all be the same size (e.g. 20 pixels), but do not have to be. They have different colors, again a case for the random generator. And of course the position of the confetti should be random, and the whole thing again runs in the game loop, that is the draw() function.
.
.
.
AnimatedPacman
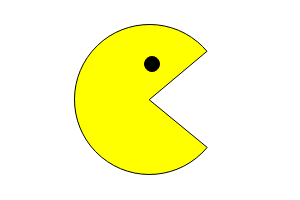
We painted our first PacMan two chapters ago. But it was quite static. We want to animate PacMan now. It is useful to know that GArcs have the following two commands:
pacman.setStartAngle(angle);
pacman.setSweepAngle(360 - 2 * angle);
If we now let the angle variable vary between 0 and 40, and do this every 50 ms, then it appears as if PacMan is animated.
.
TrafficLight
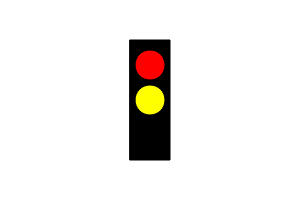
We also drew the traffic light two chapters ago. Now let's animate the traffic light. The traffic light starts with red, then turns to red-yellow, followed by green. Finally it goes via yellow back to red. The transition should take a second. For example, you could have global variables for the lights, and then use
if (currentLight == 0) {
    redLight.setFillColor(Color.RED);
    yellowLight.setFillColor(Color.BLACK);
    greenLight.setFillColor(Color.BLACK);
} ...
to turn the lights on and off. Next you have to think about how to switch between the different states. This can be done very cleverly with the remainder operator %:
currentLight++;
currentLight = currentLight % 3;
.
AnalogClock
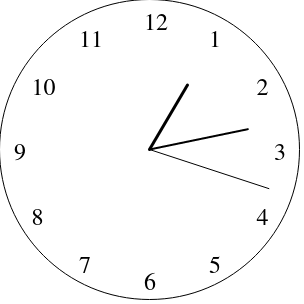
For our clock, we use a GOval for the face and GLabels for the digits. We do this in the setup() function. We could set the GLabels by hand, or calculate their position by means of sine and cosine. Both take about the same time, but the second requires a little more brains.
However, when it comes to drawing the hands, we can no longer ignore sine and cosine [7].
function drawSeconds(seconds) {
    let radians = 2 * Math.PI * seconds / 60;
    let lengthSecondHand = 250;
    let x = SIZE / 2 + Math.sin(radians) * lengthSecondHand / 2;
    let y = SIZE / 2 - Math.cos(radians) * lengthSecondHand / 2;
    secondsHand.setEndPoint(x, y);
}
here the hand for the seconds turns out to be a Gline,
secondsHand = new GLine(SIZE / 2, SIZE / 2, SIZE / 2, SIZE / 2);
which has been declared as an global variable. How to get hours, minutes and seconds we have already seen in the project "Time" in the last chapter. Since the clock should be animated, we need to place the code in the draw() function, with a frame rate one per second, or maybe only half a second.
.
DrunkenWalk
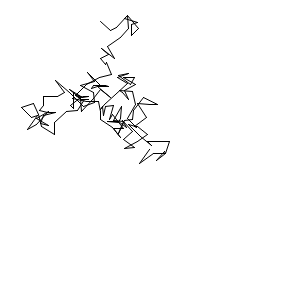
Once in a while Karel meets with a couple of friends in his favorite bar. On his way home, he no longer walks in straight lines. In this example, Karel starts in the middle. Once per second he takes one step, a random distance in a random direction. We connect the steps with GLines. The next morning, we show Karel his serpentines to let him know that next time he better take a taxi.
.
.
.
.
.
Tree*
Drawing trees turns out to be relatively difficult. A popular technique to solve this problem is recursion. Since we haven't heard anything about recursion yet, we try to draw a tree without recursion. After this experience, we may be more motivated to learn the secrets of recursion in the next semester.
.
.
.
.
.
.
AsteroidCreator
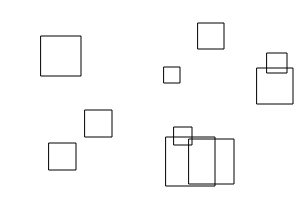
The arcade game 'AsteroidCreator®' was an absolute hit in the late 80s. The objective of the game is to draw an asteroid at the location where the user clicks with the mouse. Asteroids are simply GRects of different, random sizes with a black border. For this we have to implement the mousePressed() function, where we simply draw a rectangle at the position where the user clicked with the mouse.
.
.
.
ConnectTheClicks
Similar to the previous game, 'ConnectTheClicks®' was very popular in the late 1970s. This is a game in which the user clicks with the mouse on a point, which is then connected to the previous point. What makes the game a little more complicated is that we have to remember where the user clicked before. To do this, we simply use two global variables:
let x0 = -1;
let y0 = -1;
If we initialize these variables with the value "-1", we can use this to determine whether this is the first click. Because then we shouldn't draw a line. Otherwise, we simply draw a line (GLine) with each click from the old position to the new mouse position.
.
.
.
TicTacToe
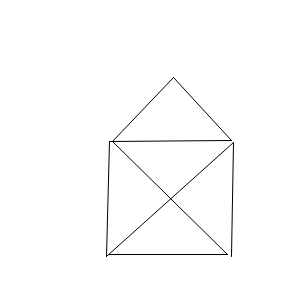
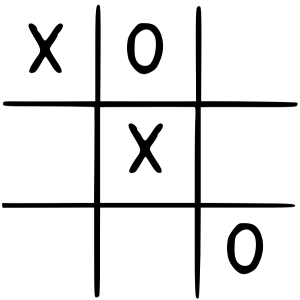
Everyone knows TicTacToe from kindergarten or school, if you don't, you can read the following about it in the Wikipedia [9]:
"TicTacToe is a pencil-and-paper game for two players, X and O, who take turns marking the spaces in a 3×3 grid. The X player usually goes first. The player who succeeds in placing three respective marks in a horizontal, vertical, or diagonal row wins the game."
In the setup() we draw the background. The easiest way is as an image, but we can also draw lines. Also, we have to add the mousePressed() function. There we simply have to draw an "X" or an "O" alternately, depending on who's turn it is. How do you know who's turn it is? This can be done using an global variable, for example:
let currentPlayer = 1;
This variable can have two values, '1' for player one and '2' for player two. Switching between the two players is then very easy:
if (currentPlayer == 1) {
    ...
    currentPlayer = 2;
} else {
    ...
    currentPlayer = 1;
}
A little thing that is very practical: you can of course simply paint the "X" and "O" where the user clicked. That looks a bit squeaky. A little trick uses Math.trunc() for positioning the "X" and "O":
function mousePressed() {
    let x = mouseX;
    let y = mouseY;
    let i = Math.trunc(x / CELL_WIDTH);
    let j = Math.trunc(y / CELL_WIDTH);
    ...
}
.
Challenges
.
Agrar
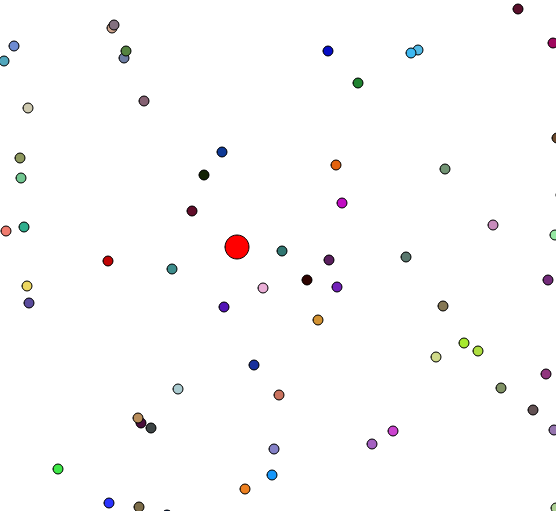
Agrar is inspired by the online game Agar.io, which according to Wikipedia [10] is about
"... navigating a cell that grows by eating pellets and other cells. However, it must not be eaten by larger cells itself."
Our version of the game is a bit simpler, there is only one cell, and it can only eat pellets. But that is already something.
First, we need an global variable for the cell:
let cell;
We initialize it in the setup() function, . Next, we need the game loop:
function draw() {
    moveCell();
    createRandomFood();
    checkForCollision();
    update();
}
Here we create a pellet at a random position, i.e., a GOval with random color. Next we check if there was a collision between the cell and a pellet. How do we know if there's been a collision? The getElementAt() function is used for this:
let collisonObject = getElementAt(x, y);
if ((collisonObject != null) && (collisonObject != cell)) {
    let w = cell.getWidth();
    cell.setSize(w + 1, h + 1);
    removeObj(collisonObject);
}
This function checks if there is something at the x,y position. If there is nothing there, the function returns the value "null". Otherwise, it returns the object that is at this position. It could be a pellet or it could be the cell itself. Therefore, we must check that it is not "null" and that it is not the cell itself. Since there is nothing else, we now know that the collisonObject must be a pellet. We "eat" the pellet, which means that the cell gets fatter and the pellet is removed.
Of course we still have to implement the mouseMoved() function. This is quite easy, we simply move the cell to the position of the mouse:
function mouseMoved() {
    xMouse = mouseX;
    yMouse = mouseY;
	cell.setLocation(x, y);
}
.
Tetris
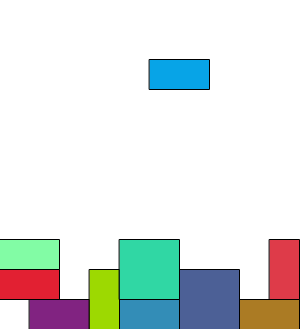
Tetris is a classic, everybody knows it. Originally it was programmed by Russian programmer Alexei Paschitnow [11]. Tetris has different stone forms that resemble Latin letters (I, O, T, Z and L). Players must rotate the individual pieces that fall from the top of the board in 90 degree increments and move them so that they form horizontal, preferably gapless rows at the bottom edge. As usual, we limit ourselves to a somewhat simpler version, in which there are only four stone forms: a single block, a horizontal and a vertical block of two, and a block of four. We cannot rotate the blocks in our simple version.
In the setup() function we create a new stone:
function setup() {
    ...
    createNewBrick();
}
The createNewBrick() function creates a random new stone. The stone shape depends on a random number:
function createNewBrick() {
    switch (rgen.nextInt(0, 3)) {
        case 0:
            brick = new GRect(WIDTH / 2, 0, BRICK_SIZE, BRICK_SIZE * 2);
            break;
        case 1:
            ...
    }
    brick.setFilled(true);
    brick.setFillColor(rgen.nextColor());
    add(brick);
}
The brick must be an global variable, otherwise it won't work. The same applies to our random generator. In order for the stones to start falling down, we need a game loop:
function draw() {
    moveBrick();
    checkForCollision();
    update();
}
The moveBrick() function simply moves the brick down by one brick width. The checkForCollision() function determines whether the stone is allowed to fall any further. Once the stone has arrived at the bottom, it just sits there. How do we do that? We simply create a new stone, and leave the old one where it is:
function checkForCollision() {
    // check bottom
    if (brick.getY() > HEIGHT - brick.getHeight()) {
        createNewBrick();
    }
    ...
However, we can also have collisions with other blocks, that are sitting already at the bottom. In this case the falling stone also is not allowed to fall any further. We need to use the getElementAt() function and check for collisions:
    // check for other bricks
	let x = brick.getX() + 1;
	let y = brick.getY() + brick.getHeight();
    let obj = getElementAt(x, y);
    if ((obj != null) && (obj != brick)) {
        createNewBrick();
        return;
    }
    ...
}
This function tells us whether there is a GObject at the x,y position. If there is, we simply create a new stone.
So, now our stones are falling. The only thing missing is key control. When a key on the keyboard is pressed, a KeyEvent occurs. This is completely analogous to the mouse events. Therefore, we need to add a keyPressed() function to our Tetris class:
function keyPressed() {
    switch (keyCode) {
        case LEFT_ARROW:
            brick.move(-BRICK_SIZE, 0);
            break;
        case RIGHT_ARROW:
            brick.move(BRICK_SIZE, 0);
            break;
    }
}
The keyCode tells us which key was pressed: for the left arrow key the keycode is 37, for the right the keycode is 39 and that is all we need to finish our simple Tetris game.
.
Pong
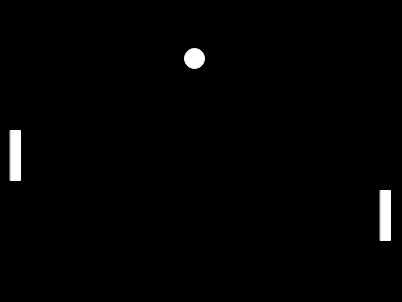
Pong was released by Atari in 1972 and is considered the forefather of all video games [8]. It is a game for two players who try to play a ball back and forth similar to ping-pong. To get started, we need three global variables for the ball and the two paddles.
let ball;
let leftPaddle;
let rightPaddle;
Then of course there is our game loop:
function draw() {
    moveBall();
    checkForCollision();
    update();
}
The moveBall() function simply moves the ball by a certain amount in x and y direction.
The checkForCollision() function does two things: it checks if there was a collision with the wall or if there was a collision with one of the paddles. If the ball wants to leave the playing field on the top or bottom, it is simply reflected. If it wants to leave on the left or right, then it simply disappears, and the round is over. If the ball collides with the paddles, it is also reflected.
For the collisions with the paddles we use the getElementAt() function. Reflection is quite simple. We first need an global variable for the speed:
let vx = 2;
let vy = 3;
and then reflection simply means:
vy = -vy;
Of course, the moveBall() function must also use these variables.
The paddles should be controlled by the keyboard, so we need to add the KeyListener again and add the keyPressed() function:
function keyPressed() {
    switch (key) {
        case 'p': // right paddle up
            rightPaddle.move(0, -PADDLE_VY);
            break;
        case 'l': // right paddle down
            ...
    }
}
Notice, we use key instead of keyCode here. We use keyCode if we want to detect special keys, however, for letters and digits, we use key. The first player controls her paddle with the keys 'q' and 'a', the second player with the keys 'p' and 'l'.
.
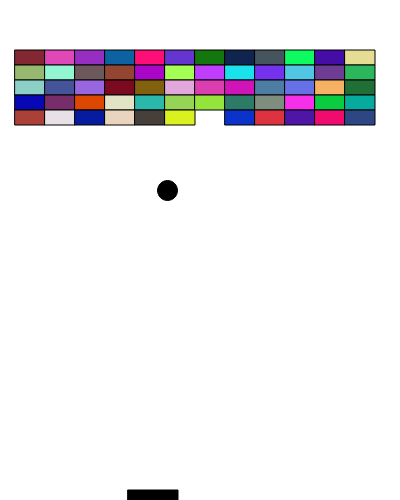
BrickBreaker
BrickBreaker is inspired by Breakout, a game that was introduced by Atari in April 1976. The game principle was developed by Nolan Bushnell. Steve Jobs, who then worked at Atari, persuaded his friend Steve Wozniak (then at HP) to write the game. Steve Jobs got paid $5,000 for the game by Nolan Bushnell. He gave his friend Steve Wozniak half, that is 350 dollars [12].
The playing field consists of bricks, a ball and a paddle. The ball moves through the playing field and when it hits a brick, the brick disappears. The ball is reflected from the walls and the paddle. Except for the lower wall: here the ball just vanishes and the game is over. In our game, the paddle is to be controlled by the mouse.
As global variables we need the ball and the paddle:
let paddle;
let ball;
In the setup() function, we initialize the ball and the paddle, and we also draw the wall of bricks:
function setup() {
  ...
  createBall();
  createPaddle();
  createBricks();
}
When drawing the wall, we can borrow our function drawRowOfNBricks(int n) from the Stairs project, so that is easy. Maybe we want to make the bricks differently colored, then the game looks much better.
After the setup we come back to the game loop:
function draw() {
  moveBall();
  checkForCollision();
  update();
}
The moveBall() function is identical to that in Pong, checkForCollision() is also very similar
function checkForCollision() {
  checkForCollisionWithWall();
  checkForCollisionWithPaddleOrBricks();
}
What needs a bit more work is the checkForCollisionWithPaddleOrBricks() function. We use the getElementAt() function again, and check if the object is not null. If it is not null, then the only options are, that either it is the paddle or a brick,
let obj = getElementAt(x, y);
if (obj !== undefined) {
if (obj === paddle) {
  vy = -vy;
} else if (obj instanceof GRect) {
  removeObj(obj);
  vy = -vy;
}
You may notice the instanceof keyword, that can be used to test if an object is a GRect, or any other type for that matter. Last thing we have to worry about, is the movement of the paddle through the mouse. For this we have to call the addMouseListeners() function in the setup() and we need to implement the mouseMoved() function:
function mouseMoved() {
  let x = mouseX;
  paddle.setLocation(x, HEIGHT - PADDLE_SEPARATION);
}
And that's it.
.
Questions
-
There are functions with a return value and some without. How can you tell that a function has no return value?
-
Some functions have parameters. What are parameters?
-
What do parameters and kilometers have in common?
-
We have used the random generator 'rgen' more than once. What is the command to generate a random number (integer) between 1 and 6?
-
If you pass a primitive data type to a function as a parameter, is it passed in as the original or as a copy?
-
Name four subclasses (child classes) of the class GObject.
-
Draw a diagram that roughly represents the class hierarchy of the GObjects.
-
We learned about the top-down approach. This gives rules regarding the names of functions, how many lines of code a function should have, etc. Name two of these guidelines.
-
Analyze the game 'Agar.io' using the top-down approach. You only need to worry about the high-level structure, not the detailed code.
-
The addThirteen() function in the following code does not work as expected. What's the problem? How would you solve it?
function addThirteen( x ) {
x += 12;
}
function run() {
let x = 4;
addThirteen( x );
println( "x = " + x );
}
-
The arcade game 'RandomCircles' was an absolute hit in the late 1980s. It is a game that draws a colorful circle at the point where the user clicks with the mouse. It would be a little to much to ask to implement the full version of the game, but it is relatively easy to write the code that
1) draws a colored circle on the screen and
2) draws the circle where the user clicked with the mouse.
The first step is to create a class called GCircle that extends GOval and is initialized with random size and color.
The second step is to write a graphics program that listens to mouse clicks and draws a circle at the location where the user clicked with the mouse.
The following information may be helpful:
let rgen = RandomGenerator.getInstance();
The RandomGenerator has among others the following functions:
rgen.nextInt( low, high )
rgen.nextColor()
.
References
The references relevant for this chapter are the same as in Chapter 2. More details about the ACM graphics library can be found on the ACM Java Task Force [1] pages. Many more examples can be found in Tutorial [2], the book by Eric Roberts [3] and the Stanford Lecture 'Programming Methodologies' [4].
[1] ACM Java Task Force, cs.stanford.edu/people/eroberts/jtf/
[2] ACM Java Task ForceTutorial , cs.stanford.edu/people/eroberts/jtf/tutorial/index.html
[3] The Art and Science of Java, von Eric Roberts, Addison-Wesley, 2008
[4] CS106A - Programming Methodology - Stanford University, https://see.stanford.edu/Course/CS106A
[5] HSL and HSV, https://en.wikipedia.org/w/index.php?title=HSL_and_HSV&oldid=694879918 (last visited Mar. 3, 2016).
[6] Moiré-Effekt, https://de.wikipedia.org/wiki/Moiré-Effekt
[7] Sinus und Kosinus, https://de.wikipedia.org/wiki/Sinus_und_Kosinus
[8] Pong, https://de.wikipedia.org/wiki/Pong
[9] Tic-Tac-Toe, https://de.wikipedia.org/wiki/Tic-Tac-Toe
[10] Agar.io, https://de.wikipedia.org/wiki/Agar.io
[11] Tetris, https://de.wikipedia.org/wiki/Tetris
[12] Breakout, https://de.wikipedia.org/wiki/Breakout_(Computerspiel)
.
 Try it
 Try it
 Try it
 Try it
 Try it
 Try it
 Try it
 Try it
 Try it
 Try it
 Try it
 Try it
 Try it
 Try it
 Try it
 Try it
 Try it
 Try it
 Try it
 Try it
 Try it
 Try it
 Try it
 Try it
 Try it
 Try it